Bookmark Tree
The "Bookmark Tree" widget displays[1] the collection of dashboards and widgets created by you and your colleagues. For example, these are the dashboards delivered by the FRTB Accelerator team:
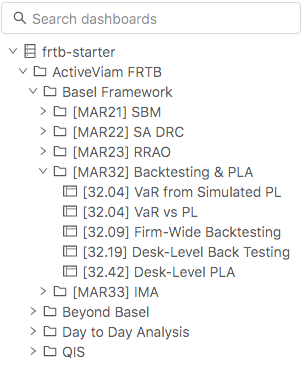
Quick Start
Finding the Bookmark Tree
The location of the "Bookmark Tree" widget depends on a particular implementation.
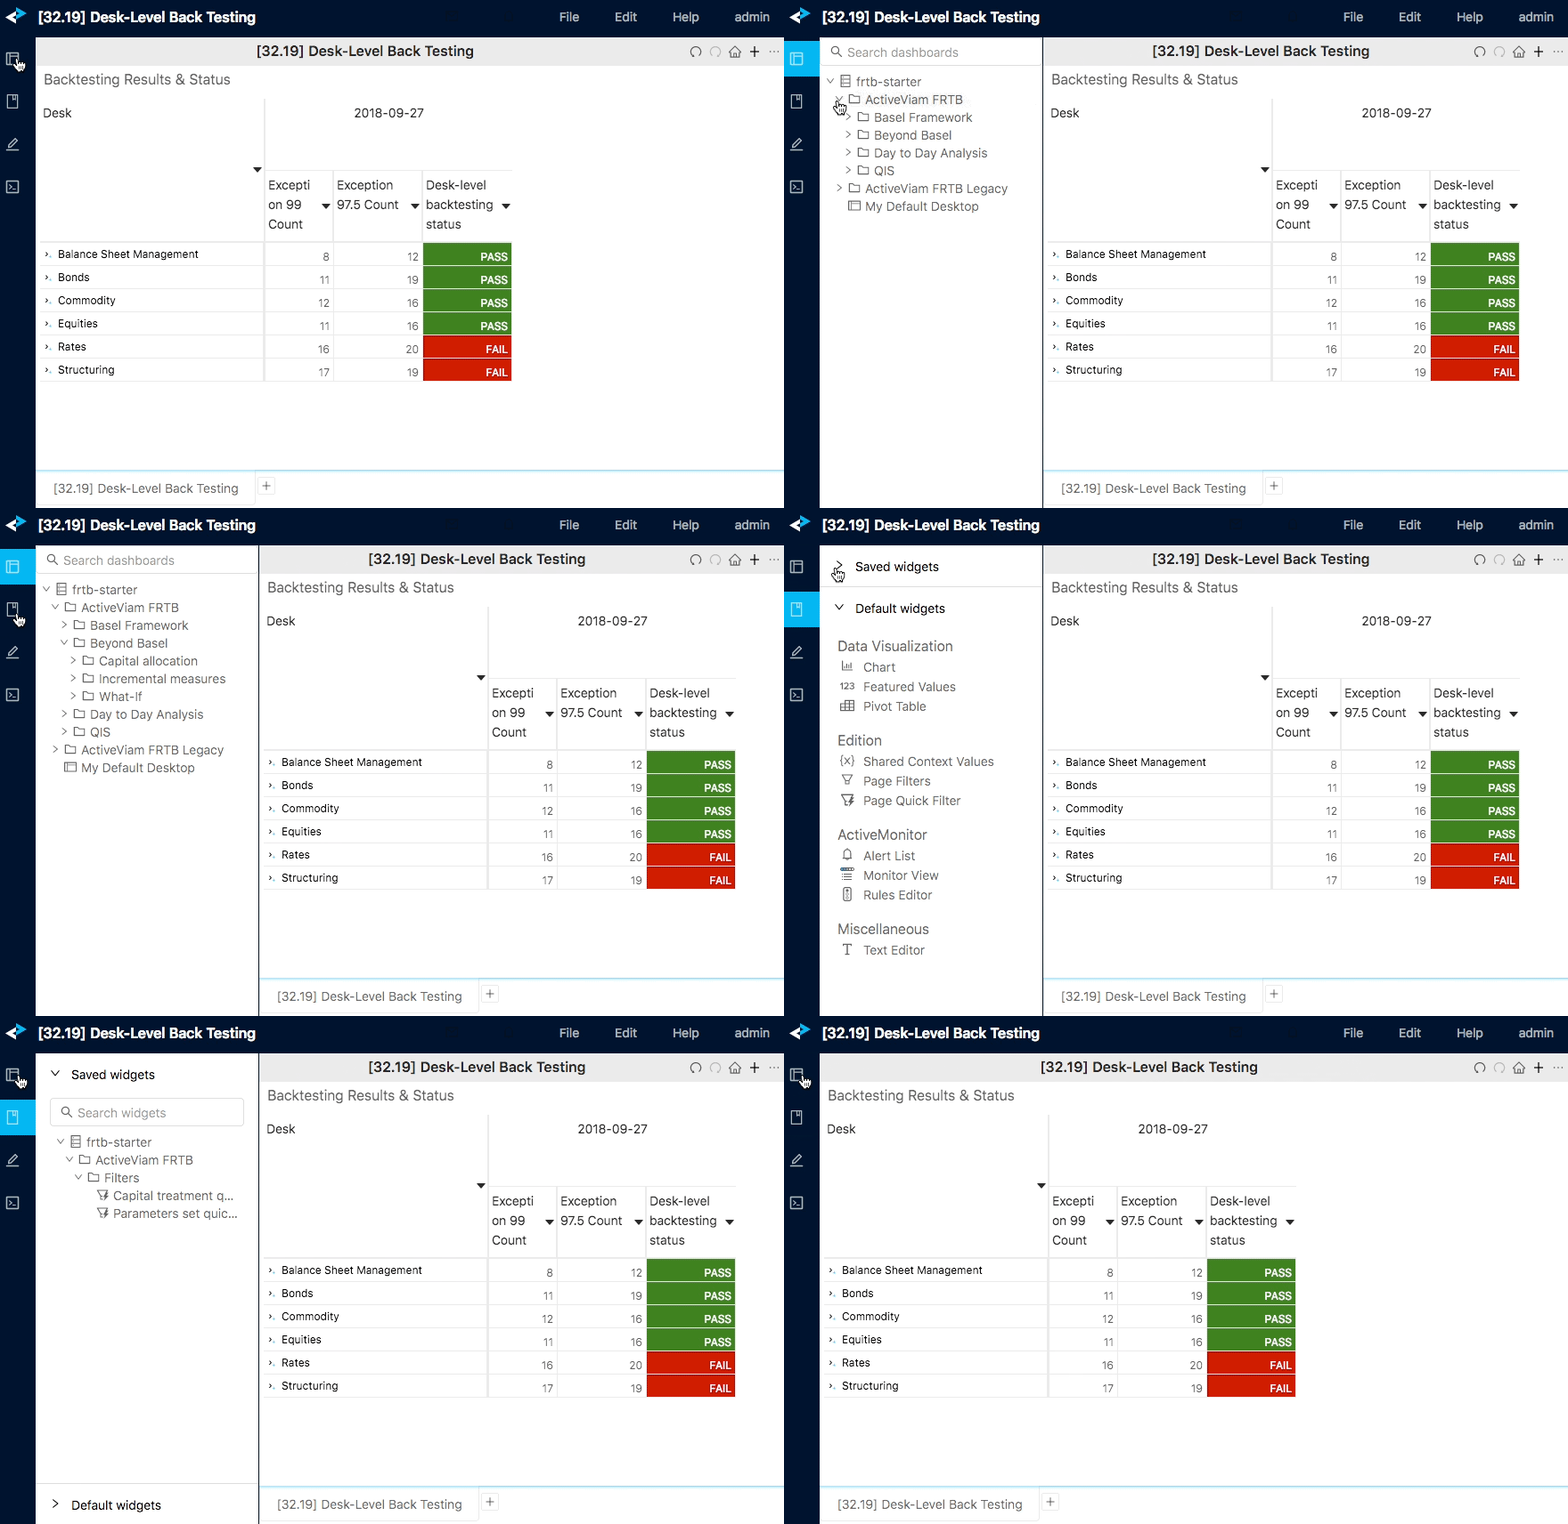
In many cases, the "Bookmark Tree" widget can be added from the empty dock or widgets library. In the following example, two separate "Bookmark Tree" widgets - one for dashboards and one for widgets - are implemented in a push/pull drawer:
Viewing Existing Bookmarks
Explore the collection of bookmarks:
- Expand and collapse folders to view existing bookmarks,
- Type in the search field to search by pattern, regexp or substring,
- Hover on a bookmark's title to see the description provided by the author, if any,
- Finally, launch a bookmark.
Launch a Bookmark
By default, the Bookmark Tree will display multiple types of bookmarks, see how they can be launched:
| Bookmark type | How to launch |
|---|---|
| Dashboards | To replace the current view, click on a dashboard's title |
| Widgets | To replace the current view, click on a widget's title. To add to the current view drag the widget into the desired area |
| Page Filters | To add to the current view, drag the widget into the desired area |
Setting as home page
You can set a dashboard as your home page, so that the dashboard will open straight away the next time you launch the application.
To make a dashboard your home page, right click and select the context menu:
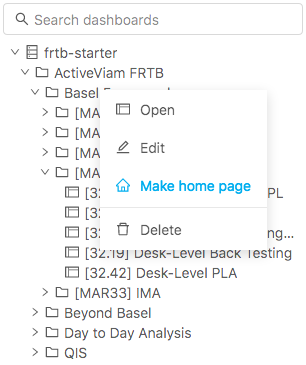
To undo the operation, right-click on the dashboard and select "Remove as home page".
The home page is configured via a setting. See settings merging order for more details.
Editing Bookmark properties
At any time, if you are an owner of the bookmark, you can right-click its title and edit properties.
Deleting a bookmark
If you are an owner of the bookmark, you can right-click its title and delete it.
Deleting a bookmark removes it from the Content Server. If your organization does not maintain a backup or an audit mechanism in the Content Server database, then the bookmark cannot be recovered. Please consult your product development team to find out more about your implementation.
When a user deletes a bookmark, the associated favorites owned by this user are deleted as well. Favorites owned by other users will keep pointing to the deleted bookmark. They will not be rendered for the current user, but will need to be removed from the Content Server by an administrator.
Folders
Folders and subfolders may be used to organize dashboards.
Creating a Folder
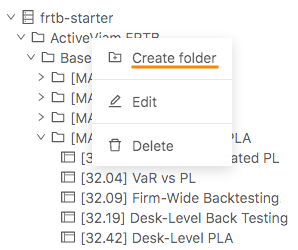
To create a new folder or subfolder, right click on a Content Server main node or on a folder and select "Create folder":
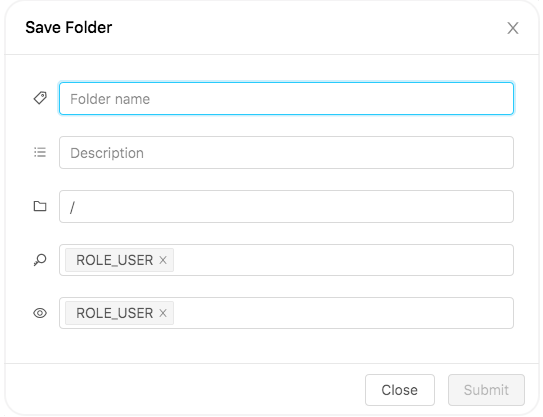
In the "Create a folder" popup, fill in the following fields:
- Folder Name: Enter a unique name.
- Description: The description will display on a dashboard's title mouseover.
- Location: Select a location, either root (Content Server) or within another folder.
- Owners: Select from the list of users or user groups configured in your organization. Owners are allowed to edit the folder.
- Readers: Select from the list of users or user groups configured in your organization. Readers are allowed to view the folder.
Editing a Folder
If you are one of the folders' owners, you can right-click the folder and edit its properties, as described above.
Deleting a Folder
To delete a Folder you need to be an owner of this folder and also be an owner of all its subfolders and bookmarks.
Deleting a Folder (or a Dashboard) removes it from the Content Server. If your organization does not maintain a backup or an audit mechanism in the Content Server database, then the Folder cannot be recovered. Please consult your product development team to find out more about your implementation.
Advanced features
Bookmarks can connect to additional Content Servers, as described below.
Add Content Server
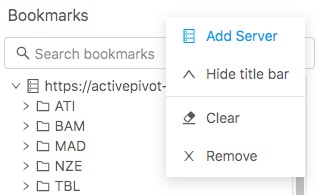
If you know the address of a Content Server to be added, you could use the "Add server" feature via the widget's context menu (...) at the top right corner[2] of the "Bookmarks" widget.
Manually added servers apply only to the current user. If you wish to change the global setting and connect a new Content Server for everyone, talk to your product development team.
Rename server
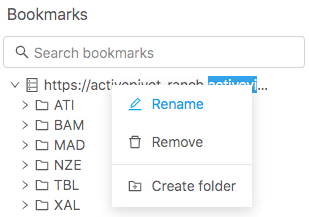
Right click on server label and select "Rename" to apply an alias for the current user.
