Display the default and experimental parameter values. See the Parameters section for information on parametrization in Atoti ISDA-SIMM.
Create or edit What-If on parameters.
The key fields defining the parameters and their values before and after the change submission are displayed in a table.The Parameter Sets widget provides the following features:
Element
Description
Category
Select a table of parameters from the Datastore.
Parameter Set
Select a version of parameter definitions. For details, see Parameter Sets.
Mode
Start a new WhatIf simulation (New), edit an existing WhatIf simulation (Edit), or compare values in two different branches (Compare).
Lineage
Toggle between the following display options: _ (Default) Only parameters that have the specific label you set in the Parameter Set. _ Include parameters inherited from previous regulation versions.
View branch
Selects the base branch for your new branch or comparison. By default the base branch is master for comparisons and always master when creating a new branch.
Mode branch
When in New or Edit Mode, enter the name of your new branch. When in Compare Mode, select the comparison branch.
In the top left menu, click Insert > Widgets, then drag and drop the Parameter Sets widget to your dashboard. On initial display, you can see the parameter values as in the master branch.
From the Category dropdown list, select a store.
From the Parameter Set dropdown list, select the parameter set you require.
(optional) Toggle the Lineage selector if you want to also display the parent parameter set in addition to the selected set.
Set Mode to New to create a new What-If branch.
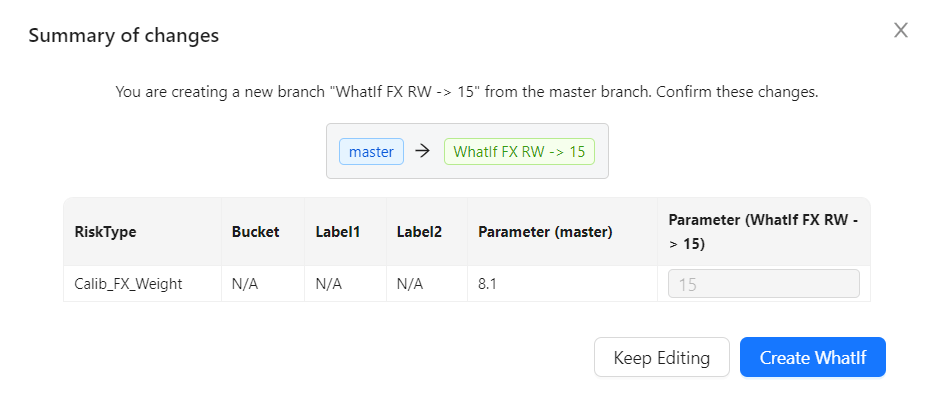
In the Mode Branch field, enter a descriptive name for your what-if simulation. For example, “WhatIf FX RW -> 15” for the branch in which “Calib_FX Weight” is changed to “15”. This name will show up in your data visualization widgets and filters. The current values for each parameter in the selected parameter set are
displayed for the master branch and your new branch. You can now make changes.
To find the parameter you require, use the search
filter by clicking on the magnifying glass on the column header.
For each parameter, enter your changes directly in the corresponding
value field on your new branch. The system highlights changed rows
in yellow, to indicate the selected values will be modified when you create your branch in the next step.
If required, you can delete your changes by clicking Discard Changes at the bottom of the table. This removes all your changes and reloads the default values.
Click View Summary to review your changes. You have the following options:
Keep Editing: Closes the summary window and returns you to the Parameter Sets table to continue your modifications.
Create WhatIf: Creates your new branch with the values you changed.
Once you are happy with your changes, click Create WhatIf.
The widget creates your new branch with the values you changed.You can now compare your new branch to master.
To view the experimental calculations, add the Epoch hierarchy into the view, for example, on columns of your Pivot Table. You may also want to set a filter on this hierarchy and select: master and your branch.
After committing your changes on the new branch, set Mode to Compare to display the committed changes made in the new branch. Changed values are highlighted in blue, to indicate the modifications are final.
Toggle the Lineage selector if you want to also display values that were changed in the parent parameter set in addition to the selected set.
To view the simulated calculations, add the Epoch hierarchy into the view, for example, on columns of your Pivot Table. You may also want to set a filter on this hierarchy and select “master” and your branch.
Select your branch from the Mode Branch dropdown list.
The widget presents an additional column, with your branch name prefixed with Edited.
For each parameter, enter your changes directly in the corresponding value field in the Edited column. The system highlights changed rows in yellow, to indicate the selected values will be modified when you update your branch in the next step.
If required, you can delete your changes by clicking Discard Changes. This removes all your changes and reloads the initial values in your branch.
Click View Summary to review your changes. You have the following options:
Keep Editing: Closes the summary window and returns you to the parameter set table to continue your modifications
Update WhatIf: Updates your branch with the values you changed
Once you are happy with your changes, click Update WhatIf. The widget updates your branch with the values you changed.