Sign-off tasks
A Sign-off task is used to define the subset of facts (for example, trade and positions data) on which an adjustment is to be performed by the designated owner, submitted for approval, then reviewed and signed off by the designated approver. The Sign-off task can be defined at any node in the hierarchy, its scope defined by conditions.
note
The default implementation provided in the Sign-Off Module has a defined workflow (i.e. task statuses) and defined user roles (i.e. manager, user). This documentation explains the default implementation, but both the state workflow and the user roles can be customized for specific business needs - see the Customizing sign-off workflow section in the Sign-Off Module Developer Guide.
Required role
In the default implementation, you must have the Manager role to be able to create tasks or perform any other actions on them. This requirement can be changed in the Activiti configuration settings. For details, see the Sign-Off Module Developer Guide.
Task statuses
The task status and workflow can be customized. The default reference implementation is documented here.
The following diagram illustrates the operations in the approval process together with the corresponding status transitions of the task object and the data in the task.
![]()
The following table describes the sequence of operations and status transitions for a task as it goes through the approval process:
| Operation | Required state of the task |
|---|---|
| Initiate sign-off (take a snapshot of the task) | Not Started |
| Create / edit / delete manual adjustments | Initiated or Rejected |
| Request approval | Initiated or Rejected |
| Approve approval request | Pending |
| Reject approval request | Pending |
| Roll back | Any status except Not Started |
| Export Note: By default, this is a server task that is automatically triggered when you Approve the sign-off task. |
Approved |
Creating tasks
The task must be defined in such a way that a fact belongs to a single domain and that the union of all the domains is equal to the entire set of facts. That is, no overlap between the tasks.
You can create individual tasks or use the bulk upload facility to define and import multiple tasks at once.
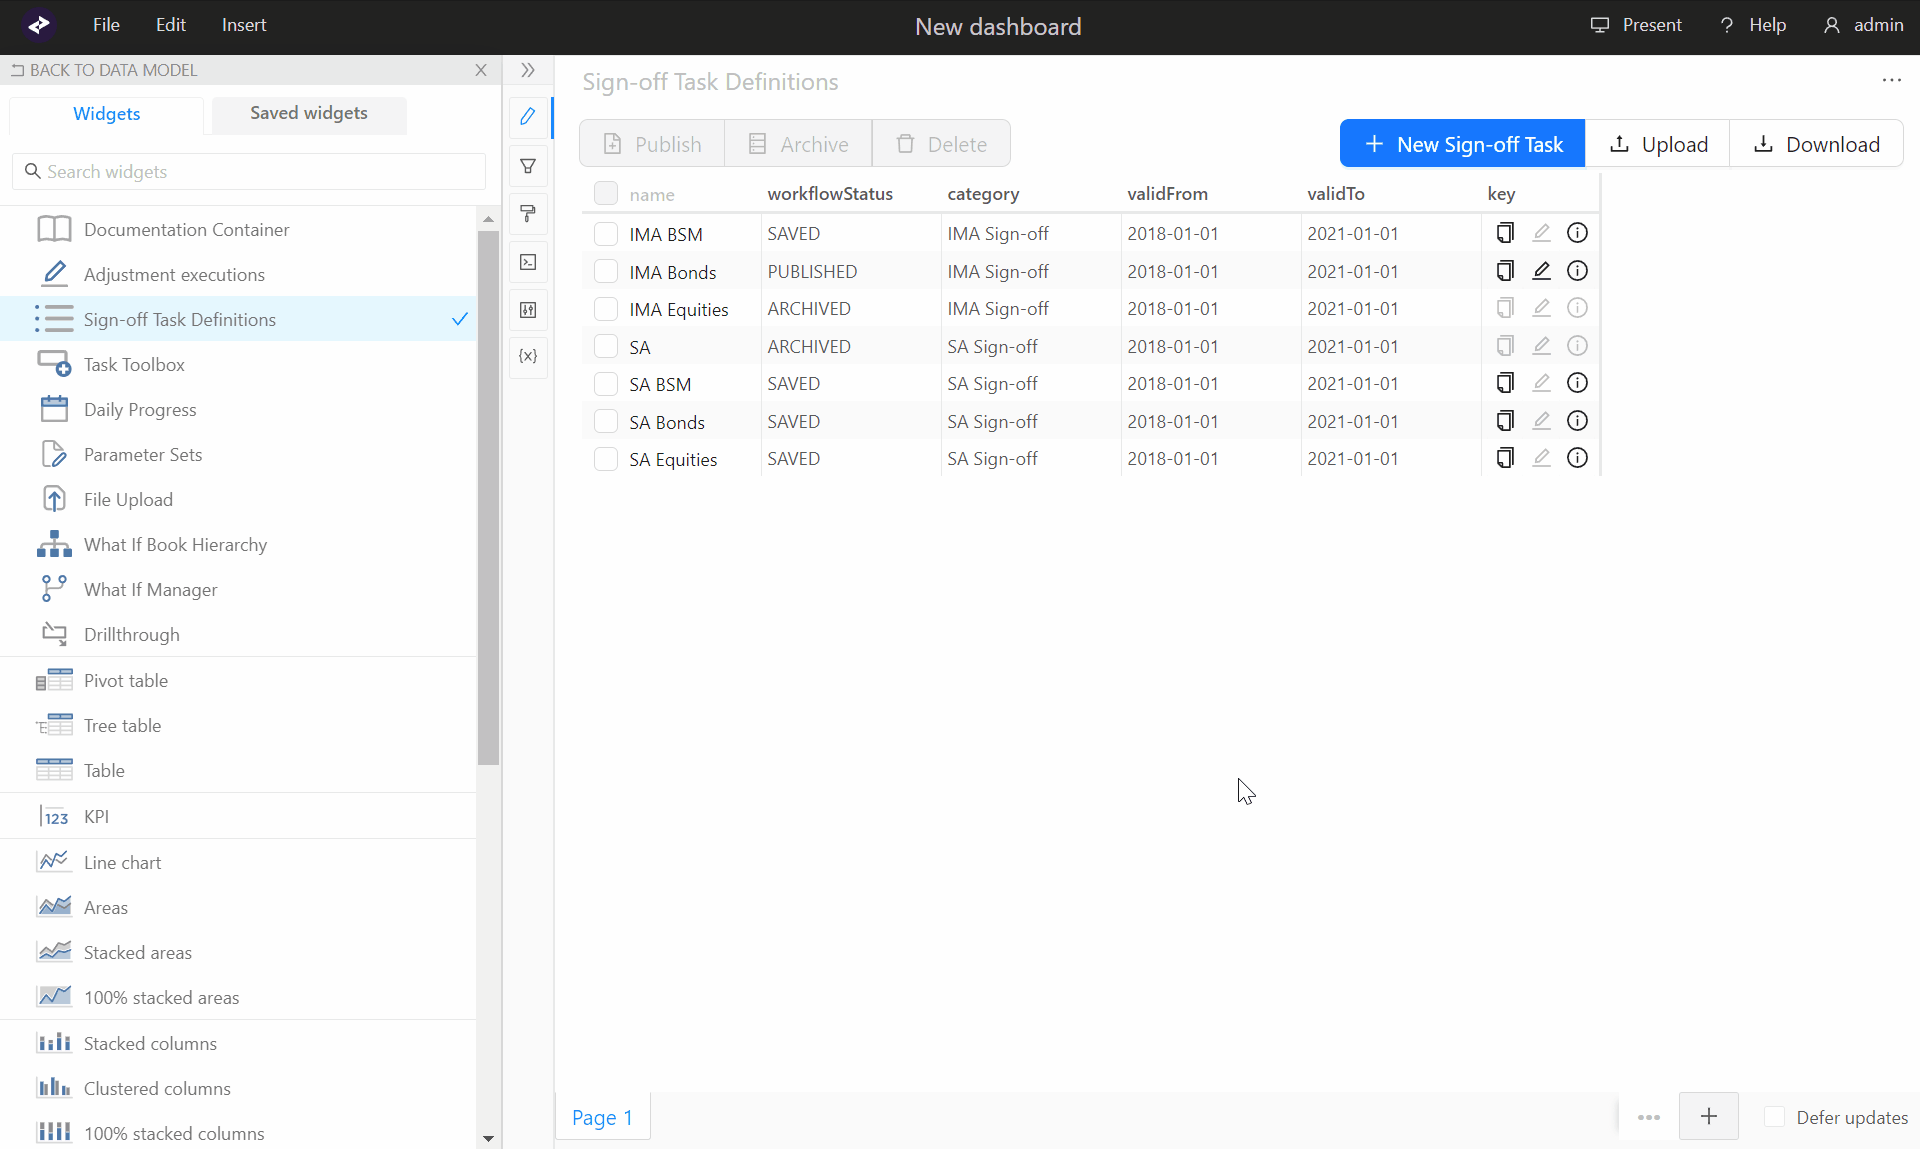
Creating a single sign-off task
-
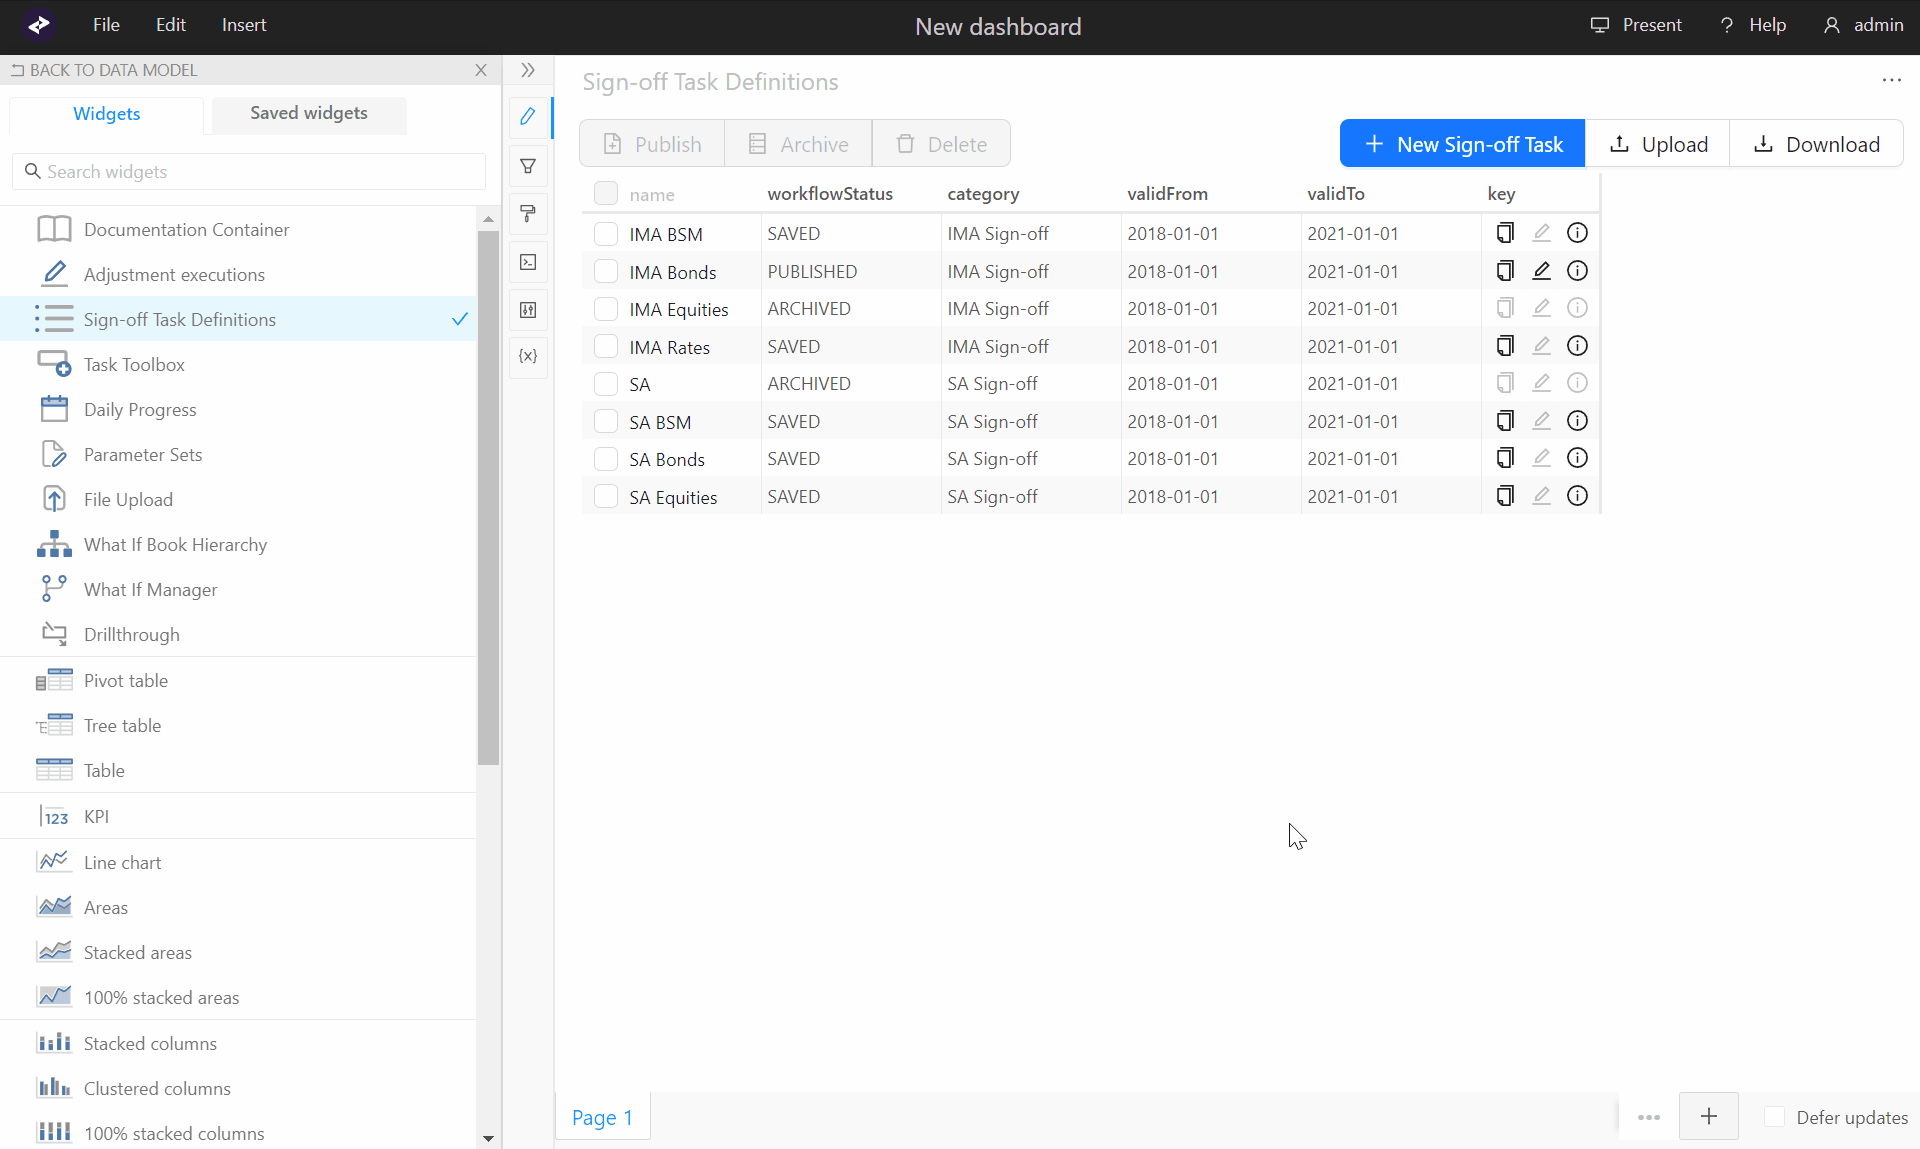
From the Sign-off Task Definitions widget, click + New Sign-off task.
The Create new Task dialog is displayed. -
In the Parameters section, define the various elements of the task:
| Field | Description |
|---|---|
| Name | Enter free text. |
| Description | Enter free text. |
| Category | Enter a meaningful name. The category name will be displayed in the Task Toolbox widget for the designated user. They can then set up dashboards consistent with that category. For example, if you create a category with the name “Sensitivity Sign-off”, the relevant users would organise a dashboard of widgets showing relevant sensitivities metrics. |
| Valid From and Valid To |
Set a validity period. The Valid From is required, but the Valid To is optional. When a task is no longer needed, you simply archive it. See Removing tasks Note: Valid From is inclusive, Valid To is exclusive). For example 2018-09-28 to 2018-12-31 denotes a validity period from 28th Sept to 30th Dec 2018 |
- In the Workflow section, define the level of scrutiny required.
| Field | Description |
|---|---|
| Type | Select level of scrutiny. Two workflows are provided in the default implementation. Additional workflows can be defined and configured in the SignOffSettings.ts file. - 4-eyes: Two separate levels of validation are required from Examiners, then Approvers. One person with the role that reviews, then another with the role that approves. - Simple: Only one level of validation is required. Someone with the role of USER can both review and approve. - 4-eyes-kpi: Automatic validation based on the KPIs you define in the KPIs field. |
| Examiners and Approvers | Based on the workflow type selected, the system prompts you to define which roles can perform the steps in the workflow. - 4-eyes: you are prompted for Examiners and Approvers. - Simple: you are only prompted for an Approver role. The roles are configured from the SignOffSettings.ts and SecurityConfig in the Atoti Server and Activiti configuration files. |
- In the Scope section, define the scope of the task:
| Field | Description |
|---|---|
| Server | (only visible if you are connected to multiple servers) From the list of available servers, select the one to use for sign-off. |
| Domain | The domain equates to the cube. Select the cube to distinguish different types of sign-off tasks within a given cube. Then set which data in the cube to sign off. Select Top of house to sign off data for a whole business day. This leaves the filters empty. |
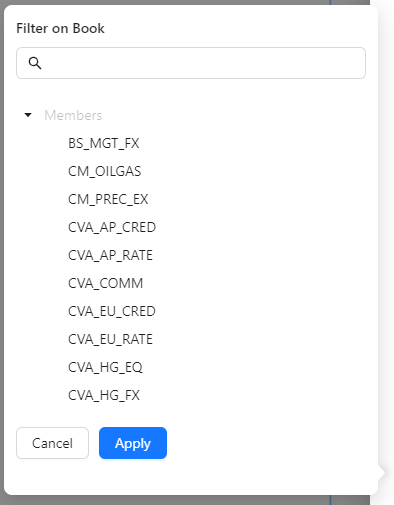
| Scope | Determines which cube location a Task applies to. The scope is made up of any level of the currently selected cube, and a corresponding value from said level. Multiple scopes can be added to a single task, determining a set of cube hierarchies to filter on (See Multiple / Parent Child scopes). note The filter condition only uses the EQUALS operator. |
| Measures and KPIs | Measures: Select which measures are to be exported. KPIs: Define the thresholds at which the task is automatically approved and exported without any review. For details of the 4-eyes KPI workflow, see Customizing sign-off backend |
-
Click Submit.
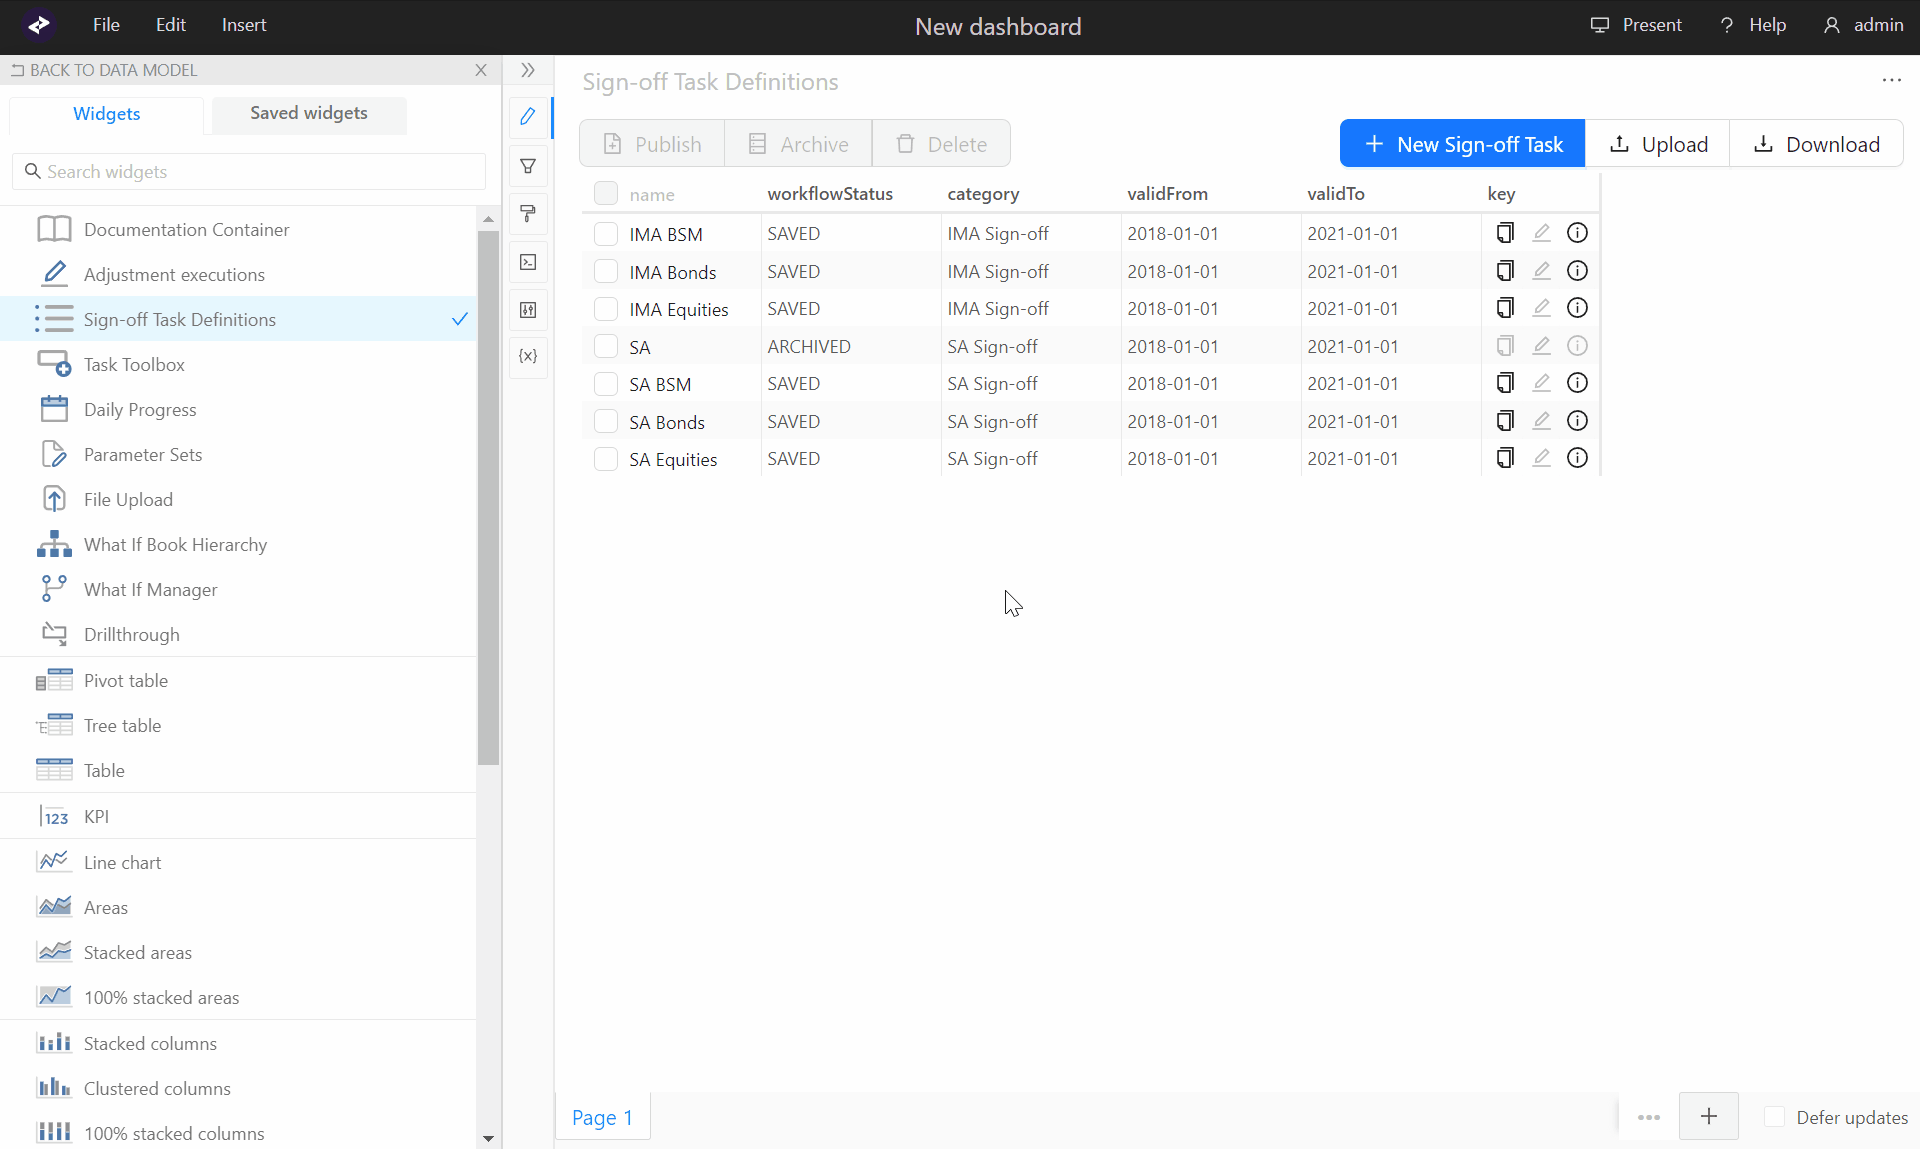
The task is created with status set to Saved. It is not yet published, so not visible to the specified owner.
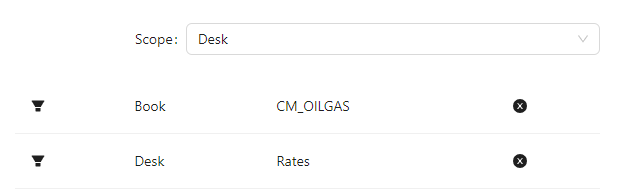
Multiple / Parent-Child scopes
After choosing a domain and unchecking the Top of house checkbox, a dropdown is enabled, allowing you to create a scope on more than one hierarchy.
Select a hierarchy’s level from the dropdown to display a popover with all members of the selected hierarchy. Click a member to create the scope.
Bulk uploading multiple tasks
-
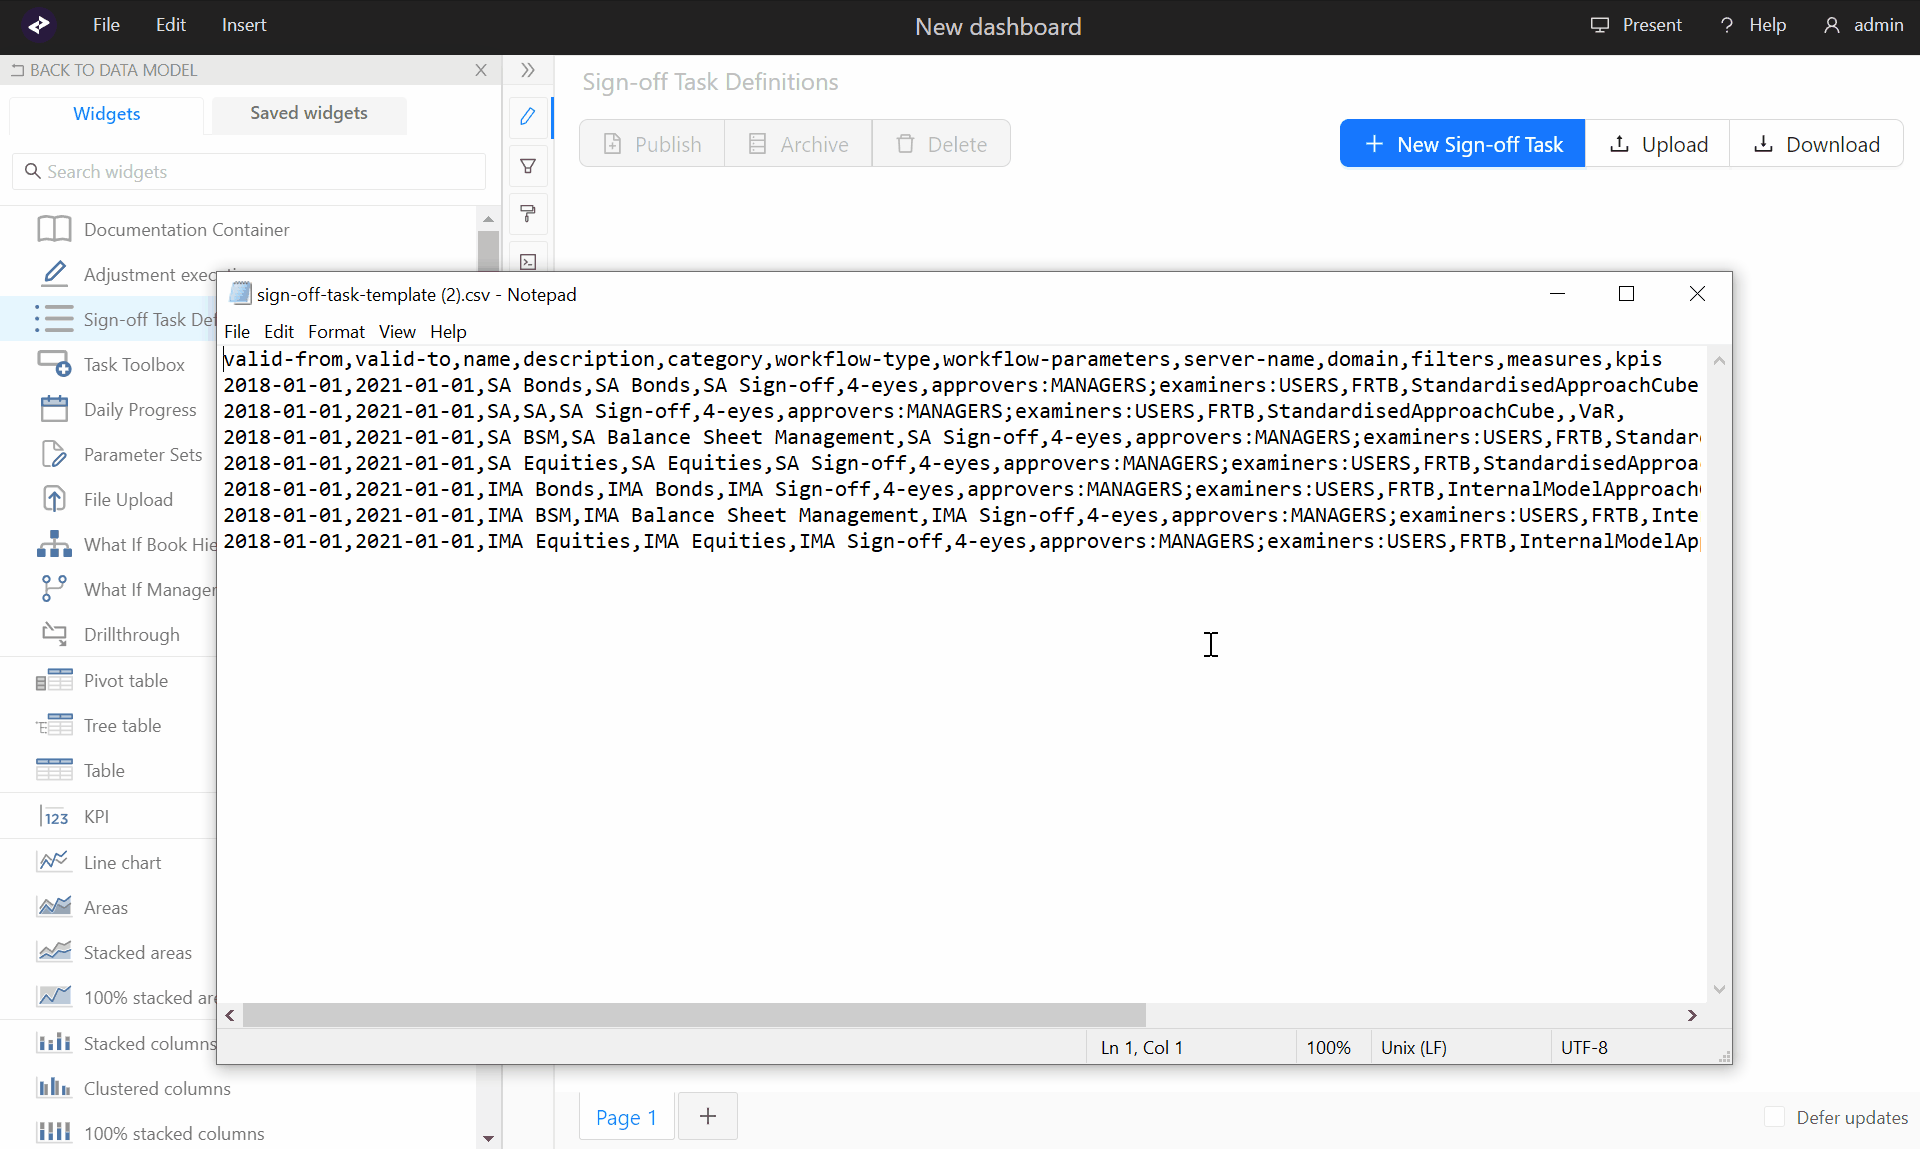
To view the CSV template showing the format required for preparing the upload, from the Sign-off Task Definitions widget, click Download.
The template is an Excel sheet with the necessary column headers and an example of the formats for each field.
-
Prepare your tasks in line with the formats required for each field:
Field Format Example valid-from yyyy-mm-dd 2019-01-31 valid-to yyyy-mm-dd 2021-04-15 name Free text Sensi-Gamma description Free text Sensitivities Gamma category Free text Sensitivity Cube workflow-type Must map to one of the workflow types defined in workflow configuration file SignOffSettings.ts 4-eyes workflow-parameters Must map to Activiti configuration in SignOffSettings.ts approvers:MANAGERS; examiners:USERS server-name Must map to the server names configured in the rest-apissection of the application.yaml configuration file.MR domain Name of cube you want to explore Sensitivity Cube filters Set the fields to filter by in the chosen cube schema. Multiple hierarchies/Parent-Child hierarchies can be added to a Task’s scope. field EQUALS value1;field2 EQUALS value2.
Parent Child scope: fieldEQUALS value1 value2 value3 measures Name of measures you want to explore Gamma;Vega kpis Set the thresholds at which the task is automatically approved and exported without any review kpi1;kpi2 -
Complete the spreadsheet with the task details, then Save.
-
To upload your spreadsheet, click Upload, navigate to the file, then click Upload again.
note
The tasks are created and automatically set to Saved.
Managing tasks
To perform actions on tasks, you must log in as a Manager and use the Sign-off Task Definitions widget.
Copying tasks
To quickly create a new task based on an existing one:
-
From the Sign-off Task Definitions widget, select the task you require, then click the copy icon.
-
Make the minor modifications to the definition, then click Copy.
Publishing tasks
The animation demonstrates how to publish, archive, and delete tasks:
A task is not visible to the designated owners until the Manager publishes it.
-
From the Sign-off Task Definition widget, select the relevant tasks, then click Publish.
The task is added to the list for the specified owner who can work on it from the Task Toolbox widget.
The designated owner can view or initiate the task for a specific date.
Modifying tasks
By default, you can only modify Published tasks. This behavior can be changed in the Activiti configuration files.
-
From the Sign-off Task Definitions widget, select the task you require, then click the edit icon.
The Edit Sign-off Task panel is displayed.
-
Make your changes, then click Submit.
The updated task is displayed in the table.
Viewing task details
To see the parameter, workflow and scope details for a particular task:
-
From the Sign-off Task Definition widget, select the relevant tasks, then click the view icon.
The Sign-off Task Details panel is displayed.
Removing tasks
If you want to remove a task, you can either archive or delete it, depending on its status.
-
From the Sign-off Task Definition widget, select the relevant tasks, then click the option you require:
-
Archive: Tasks that are already Published
-
Delete: Only Saved tasks
-
Working with the data in a task
note
The workflow and roles stated in these operations describe what is provided by default. Your administrator can change these settings in the Activiti configuration file. For more information, see the Sign-off Module Developer Guide.
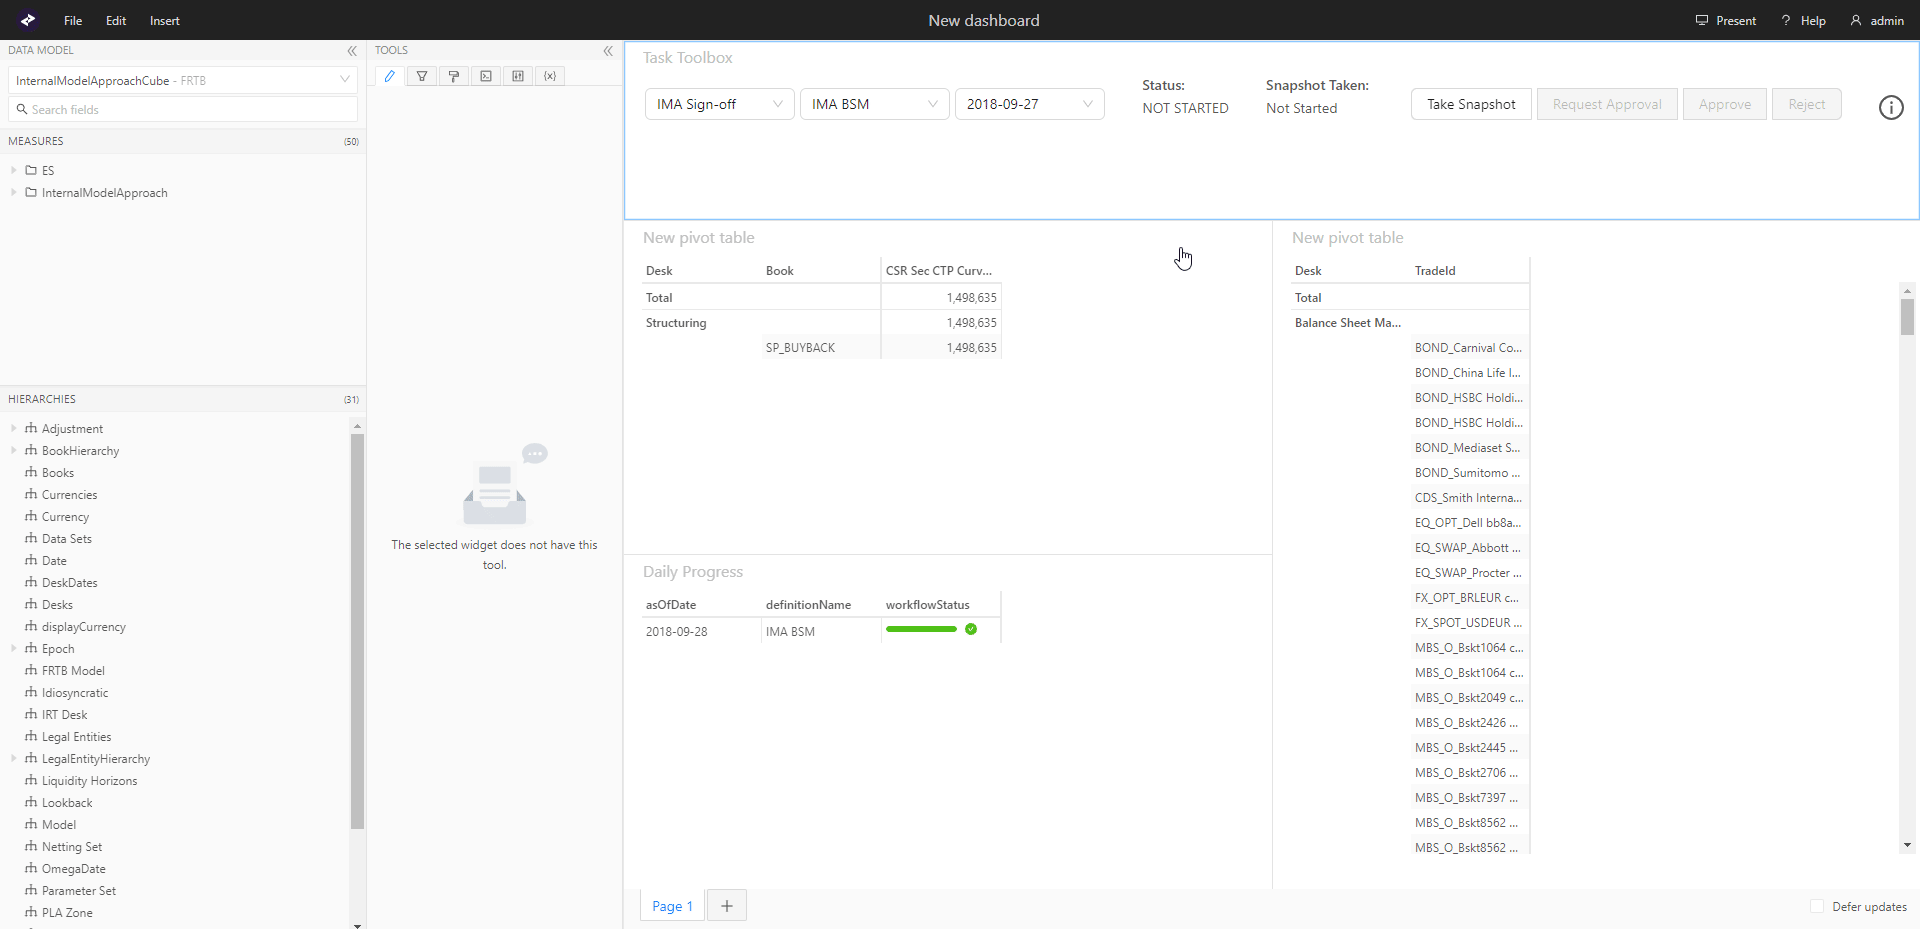
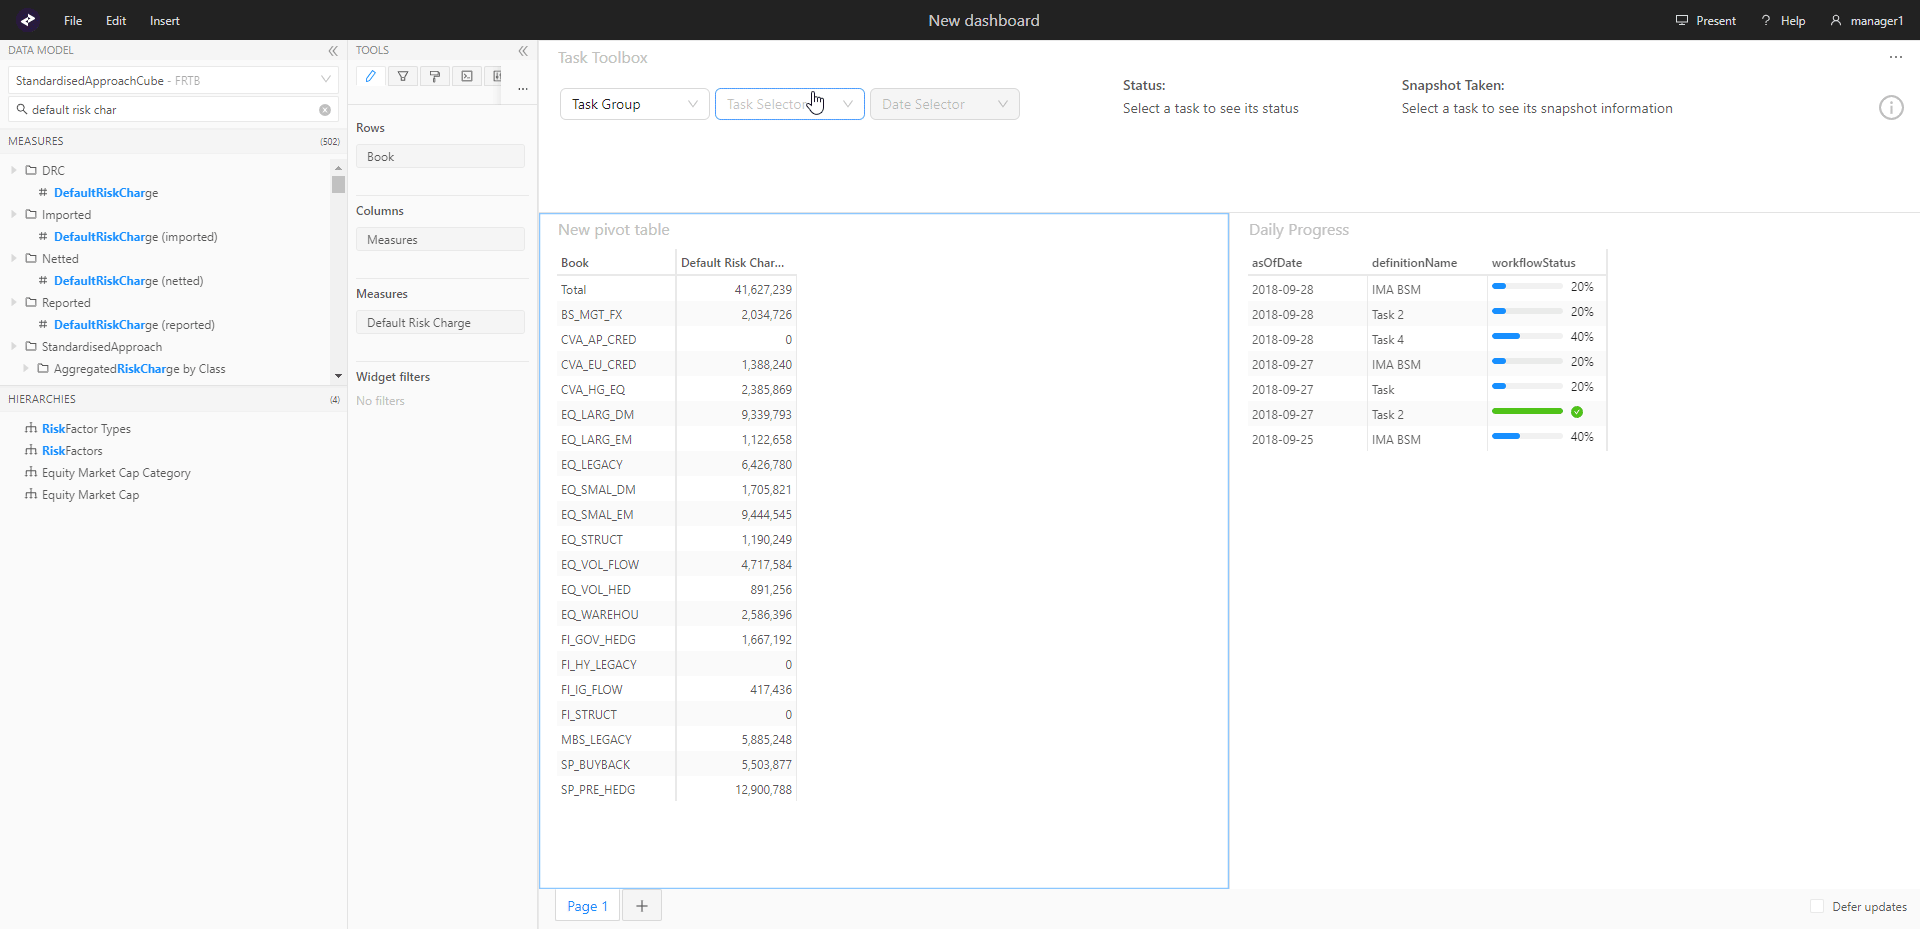
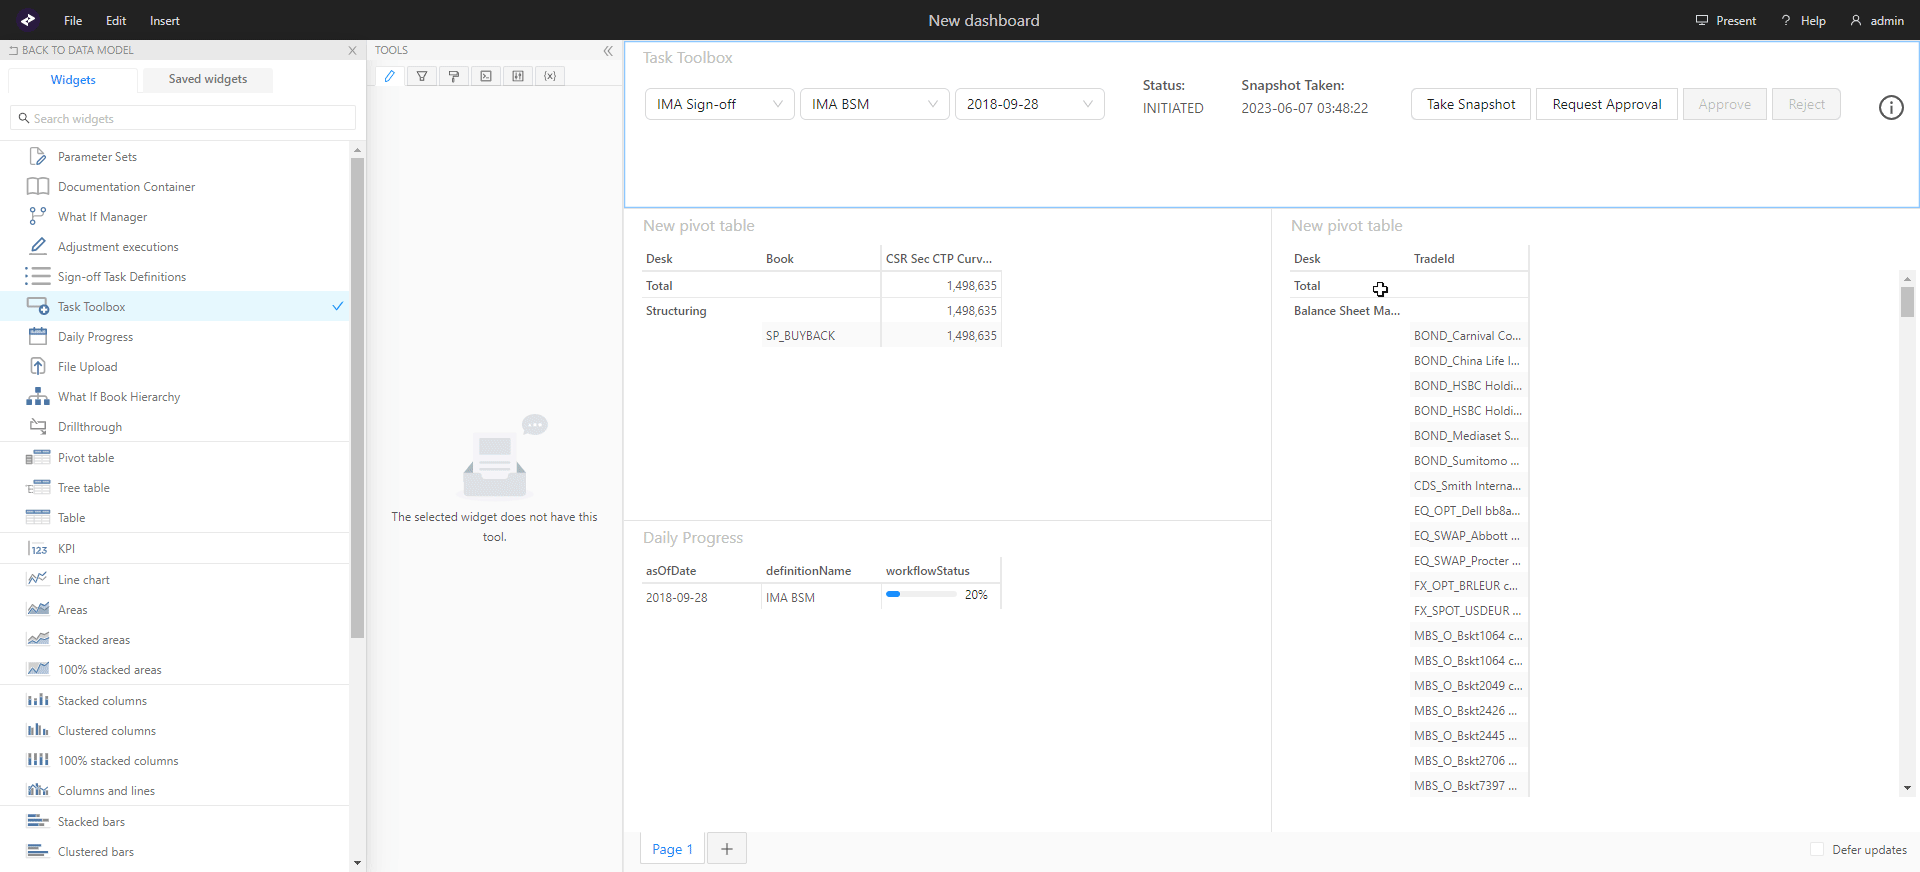
Use the Task Toolbox widget to perform actions on the data in tasks assigned to you.
Viewing assigned tasks
In the Task Toolbox select the task dropdown list to see the set of tasks assigned to your role.
Initiating tasks
-
In the Task Toolbox view, use the dropdown boxes to select a task that has the status Not Started, then click Take Snapshot.
-
Click the status box to view details of the sign-off task.
Submitting for approval
The animation demonstrates how to request approval and then rollback if required:
Once you have reviewed your adjustments to the data in your task:
-
Click Request Approval.
-
(Optional) Add a note.
By default, this is optional, but can be configured in the SignOffSettings.ts configuration file. For details, see the Sign-Off Module Developer Guide
-
Click Request Approval.
The task is routed to the Manager and status is set to Approval Requested in the Sign-off task history panel and Pending in the status box.
Rolling back tasks
If needed, at any point after the task is initiated, you can roll back the modifications and adjustments you have made and start again.
- Click Take Snapshot.
The system performs the following:
- Rolls back all adjustments
- Takes a fresh snapshot of the data
- Reapplies any recurring adjustments
- Resets the task to Initiated and returns it to your workflow
Approving or rejecting tasks
The animation demonstrates how to reject and approve tasks:
-
As a Manager, in the Task Toolbox view, select the Pending task from the task list. The details of the specified task are displayed in the task history panel on the right.
-
Review the task, and click the task information icon to check the audit trail.
-
Depending on the results of your review, click the operation you want to perform:
-
Approve: The task is set to the Approved status, and the Export process launches automatically. You can see the progress of the export in the task status and in the Task Information drawer.
-
Reject: The task is returned to the submitting user’s workflow for further modification and to be resubmitted
- Enter a comment and click the operation confirmation button to proceed.
-
Exporting approved task data
The export is performed automatically when the approver clicks Approve.
To view the status of the export process:
-
From the Daily Progress panel, check the progress bar for the relevant task. When the process is complete, the progress bar turns green and a green tick is shown next to it.
-
Click the Task Information Icon in the Task Toolbox to view detailed information in the Task Information Drawer.
By default, the process performs three levels of export; store, cube, and aggregated.
For each of these exports the panel reports the names of the exported files, how many there were, their status, and the timestamp.
To view the exported data:
-
In your file system, navigate to the export directory configured by your Accelerator administrator .
The files are stored in CSV format. For example, in MR by default the exports are stored in the format:
```
\\\[AsOfDate\]\\MR\_\[Sign-offtaskId\]\_\[Date\]\_\[Timestamp\].csv
```
For details, see the Sign-Off Module Developer Guide.