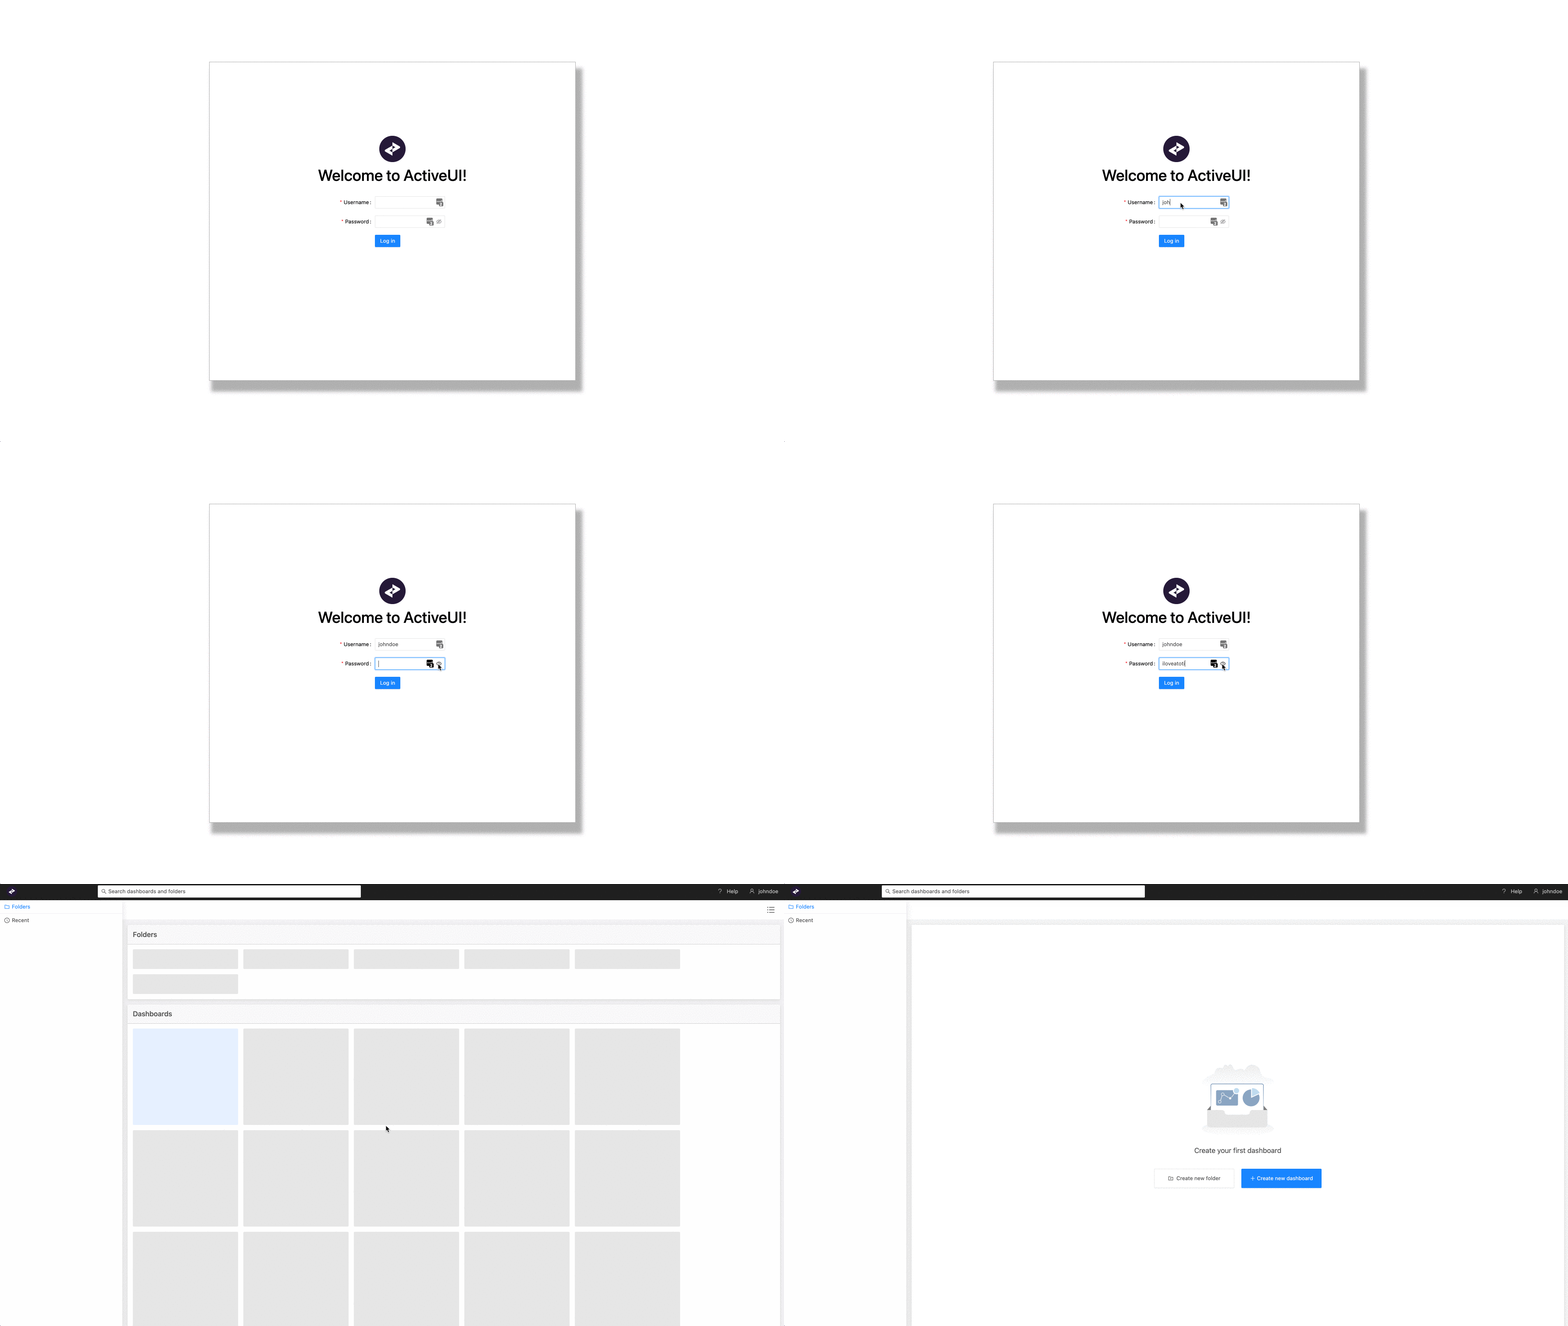
Custom authentication
This advanced guide shows how to replace the default ActiveUI authentication mechanism with a custom one.
note
We will use a modified ActivePivot server, but you do not need to deploy it locally: it is accessible at https://activeui-custom-authentication-server.activeviam.com:9090.
In this guide, we will:
- use a different authentication endpoint.
- use a Bearer token instead of a JWT token.
- create a custom login form.

Default authentication#
Before we start, it is worth understanding how ActiveUI authenticates users by default.
It is pretty simple: the servers it communicates with (ActivePivot and the content server) only respond to trustworthy clients. And a client is deemed trustworthy if it possesses a valid token.
This diagram shows a slightly simplified version of how things work:
With this in mind, let's get started!
Get started#
Before anything, download, install and build the ActiveUI Starter. See how in Setup.
This time, we will use another server.
Replace the content of your env.development.js and env.production.js files with:
window.env = { contentServerVersion: "5.11.x", contentServerUrl: "https://activeui-custom-authentication-server.activeviam.com:9090", activePivotServers: { "custom-server": { url: "https://activeui-custom-authentication-server.activeviam.com:9090", version: "5.11.1", }, },};note
If you are running yarn start, then you need to stop it and restart for this change to be taken into account.
The default authentication is handled by withSandboxClients, in the file index.tsx. withSandboxClients is a higher-order component responsible for:
- displaying a login form if the user hasn't authenticated yet
- providing the clients to its descendants (see ActivePivotClient and ContentClient)
- providing the username and roles to its descendants
Our goal now is to replace this with our own higher-order component which will handle the same responsibilites.
Let's get to doing that by first removing withSandboxClients from our code, and seeing what happens!
- import { withSandboxClients } from "@activeviam/sandbox-clients";
  const extension: ExtensionModule = {    activate: async (configuration) => {
-    configuration.higherOrderComponents = [withSandboxClients];+    configuration.higherOrderComponents = []
    },  };
export default extension;Open up your dev tools. You should see the following error:
Error: No clients found. Did you forget to provide them with `<ClientsProvider />` ?This is because of point 2 above: a component tried to communicate with a server but could not find the client to do it.
Context providers#
Create a new file under src/ and call it withCustomAuthentication.tsx. Paste the snippet below into it.
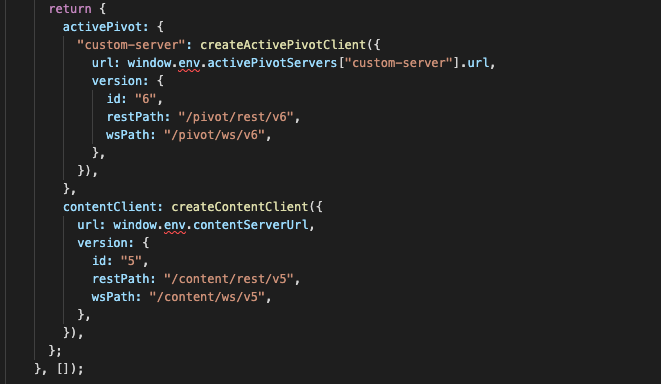
Notice that this file defines a higher order component called withCustomAuthentication, which creates clients and passes them down to the given Component (which in practice will be the entire ActiveUI application).
import React, { ComponentType, useMemo } from "react";import {  createActivePivotClient,  createContentClient,  ClientsProvider,  ContentClient,  ActivePivotClient,  UserProvider,} from "@activeviam/activeui-sdk";
/** * Higher order component providing the user information to underlying components. * Also provides the clients allowing them to communicate with ActivePivot and the content server. */export function withCustomAuthentication<P>(  Component: ComponentType<P>): ComponentType<P> {  const Wrapped = (props: P) => {    const clients = useMemo<      | {          contentClient: ContentClient;          activePivot: {            [serverKey: string]: ActivePivotClient;          };        }      | undefined    >(() => {      return {        activePivot: {          "custom-server": createActivePivotClient({            url: window.env.activePivotServers["custom-server"].url,            version: {              id: "6",              restPath: "/pivot/rest/v6",              wsPath: "/pivot/ws/v6",            },          }),        },        contentClient: createContentClient({          url: window.env.contentServerUrl,          version: {            id: "5",            restPath: "/content/rest/v5",            wsPath: "/content/ws/v5",          },        }),      };    }, []);
    return (      <UserProvider value={{ username: "admin", userRoles: ["ROLE_ADMIN"] }}>        <ClientsProvider value={clients}>          <Component {...props} />        </ClientsProvider>      </UserProvider>    );  };
  Wrapped.displayName = `withCustomAuthentication(${Component.displayName})`;
return Wrapped;}You might notice the following TypeScript error:

It can be fixed by creating an env.types.ts file under src with the content below.
This lets TypeScript know that the window object has an env attribute.
In practice, this attribute is attached by env.development.js and env.production.js.
import { Env } from "@activeviam/sandbox-clients";
declare global { interface Window { env: Env; }}Let's wire withCustomAuthentication into our application. Navigate to src/index.tsx and make the following edits:
+ import { withCustomAuthentication } from "./withCustomAuthentication";
 const extension: ExtensionModule = {   activate: async (configuration) => {
-   configuration.higherOrderComponents = [];+   configuration.higherOrderComponents = [withCustomAuthentication];
}, };Refresh the page. We're now faced with another error:
No response received from: https://activeui-custom-authentication-server.activeviam.com:9090/content/rest/v5/files/ui/dashboards/structure.This is because we are making requests to our servers without attaching the required token, proving that we are trustworthy. Let's fix that.
Attaching the token#
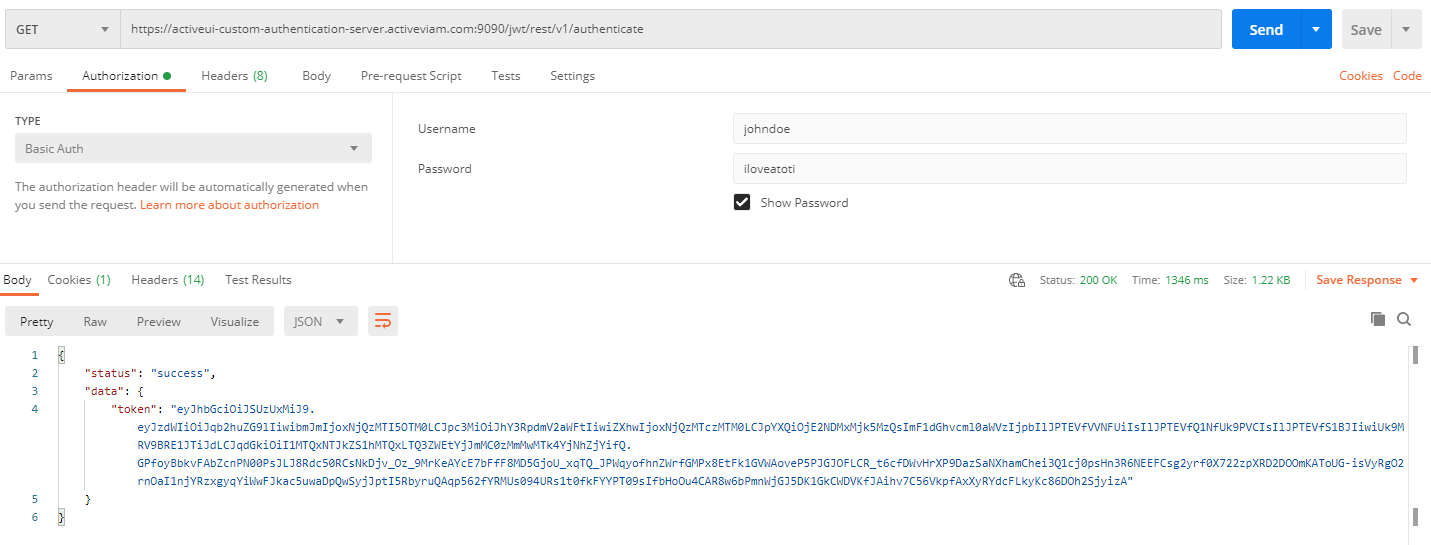
In this example, our server features a REST endpoint at https://activeui-custom-authentication-server.activeviam.com:9090/jwt/rest/v1/authenticate allowing to retrieve the token. This endpoint accepts the username and password in a Basic Authentication format. For this tutorial, there is a demo user available with the username of johndoe and password iloveatoti. You can request a token with a REST client, such as Postman.

Let's hardcode them, in a naive attempt to make our application work. We can leverage the requestInit argument of createActivePivotClient and createContentClient in order to pass additional headers that should be attached to HTTP requests.
Make the following edits to withCustomAuthentication:
import React,{  ComponentType,  useMemo,+ useState  } from "react";import {  createActivePivotClient,  createContentClient,  ClientsProvider,  ContentClient,  ActivePivotClient,  UserProvider,+ getUserRoles} from "@activeviam/activeui-sdk";


  const Wrapped = (props: P) => {
+   const [credentials] = useState({+     username: "johndoe",+     token: "paste-your-token-here",+   });
+   const userRoles = credentials ? getUserRoles(credentials.token) : []
    const clients = useMemo<      | {          contentClient: ContentClient;          activePivot: {            [serverKey: string]: ActivePivotClient;          };        }      | undefined    >(() => {
+     const requestInit = {+       headers: { authorization: `Bearer ${credentials.token}` },+     }
      return {        activePivot: {          "custom-server": createActivePivotClient({            url: window.env.activePivotServers["custom-server"].url,            version: {              id: "6",              restPath: "/pivot/rest/v6",              wsPath: "/pivot/ws/v6",            },+           requestInit          }),        },        contentClient: createContentClient({          url: window.env.contentServerUrl,          version: {            id: "5",            restPath: "/content/rest/v5",            wsPath: "/content/ws/v5",          },+         requestInit        }),      };-   }, []);+   }, [credentials]);
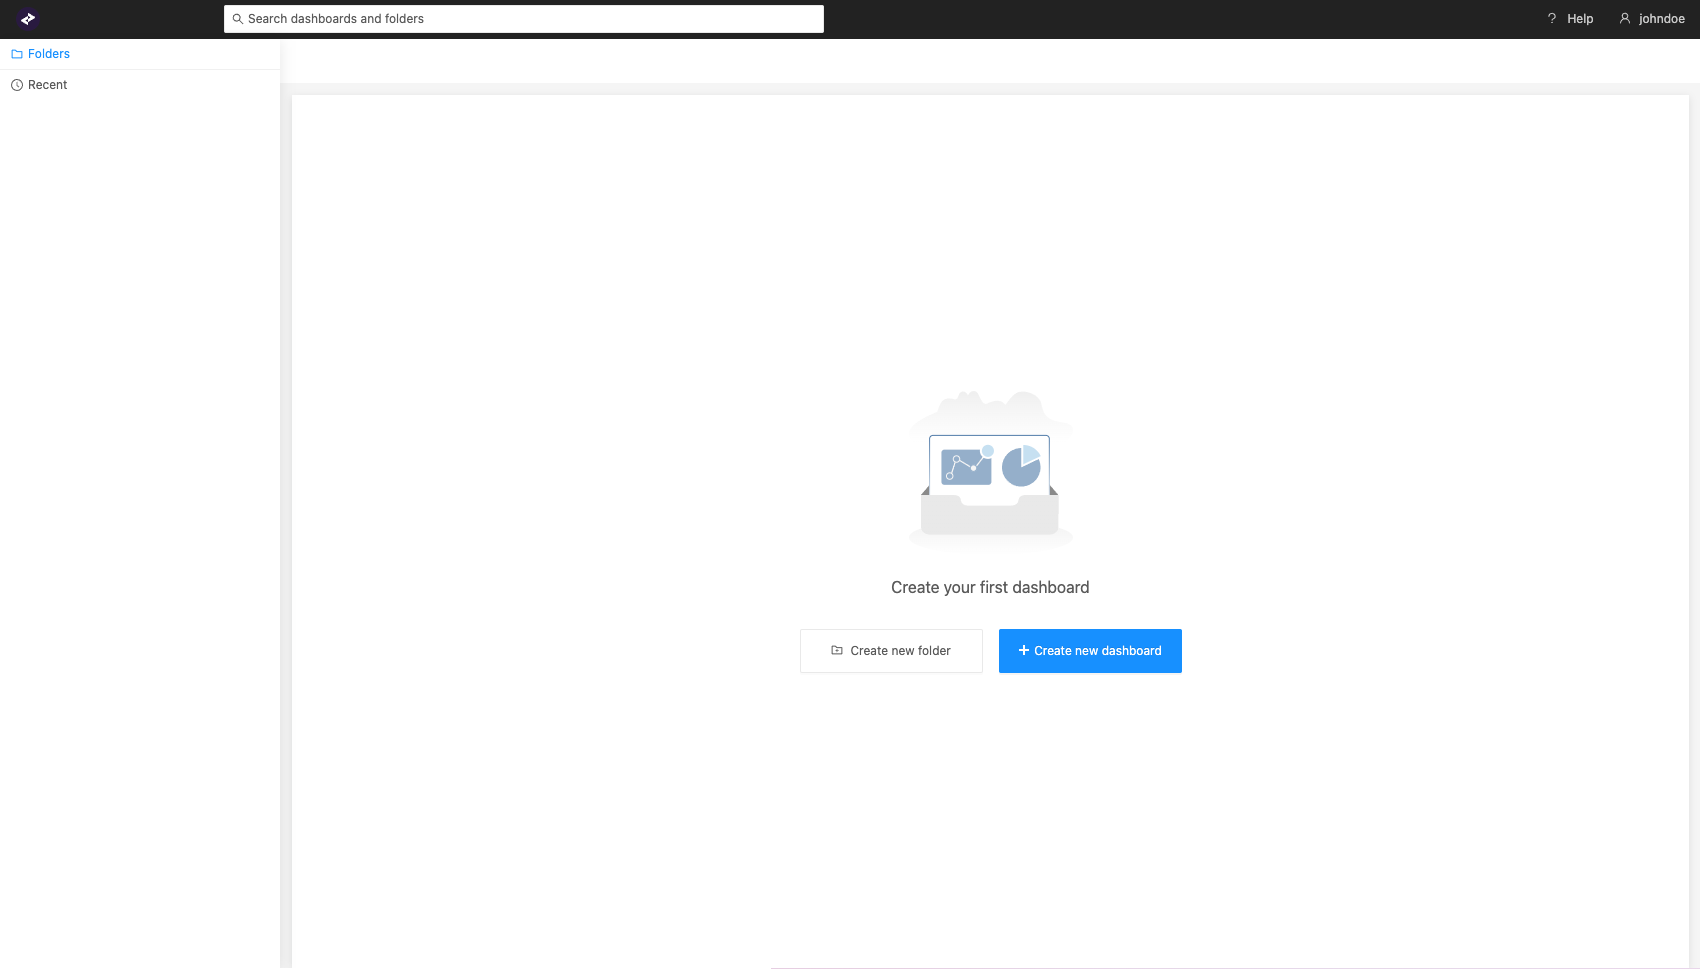
return (- <UserProvider value={{ username: "admin", userRoles: ["ROLE_ADMIN"] }}>+ <UserProvider value={{ username: credentials.username, userRoles }}> <ClientsProvider value={clients}> <Component {...props} /> </ClientsProvider> </UserProvider> ); };It works!

warning
Of course we cannot ship this to production: it would be both very unsafe and bugged: everybody would be able to connect as johndoe until the hardcoded token expires. After it does, the application would stop working altogether.
We must allow users to log in so that they can retrieve their own token. To do so, we will create a login form.
Login form#
Let's create a new file: src/authenticate.ts, in order to define a function allowing to call our server to request a token, given a username and password:
/** * Sends `username` and `password` to the server in order to retrieve a token. * Returns the token, if the authentication was successful. */export async function authenticate(  url: string,  { username, password }: { username: string; password: string },): Promise<string> {  const response = await fetch(`${url}/jwt/rest/v1/authenticate`, {    headers: {      authorization: `Basic ${btoa(`${username}:${password}`)}`,    },  });
const body = await response.json(); return body.data.token;}Create another file: src/LoginForm.tsx, in order to define our login form component.
The login form should call back its parent component with a username and a token in case of successful login.
/** @jsx jsx */import { css, jsx } from "@emotion/core";import { FC, useState } from "react";import Form from "antd/lib/form";import Input from "antd/lib/input";import Button from "antd/lib/button";
import { authenticate } from "./authenticate";
export interface Credentials {  username: string;  token: string;}
interface LoginFormProps {  onLoggedIn: (credentials: Credentials) => void;}
/** * Displays a login form in order to let the user type in their username and password and send them to the server, to receive their token. */export const LoginForm: FC<LoginFormProps> = ({ onLoggedIn }) => {  const [formValues, setFormValues] = useState<{    username: string;    password: string;  }>({    username: "",    password: "",  });
  const handleSubmit = async () => {    const { username, password } = formValues;    const token = await authenticate(      "https://activeui-custom-authentication-server.activeviam.com:9090",      { username, password },    );
    onLoggedIn({ username, token });  };
  return (    <div      css={css`        width: 100%;        height: 100%;        padding: 12em 5em;        display: flex;        justify-content: center;      `}    >      <div        css={css`          display: flex;          flex-direction: row;          width: 50%;          height: 100%;          box-shadow: 10px 20px 8px 5px #949494a7;          border: #949494a7 1px solid;        `}      >        <div          css={css`            display: flex;            background-color: white;            height: 100%;            width: 100%;            flex-direction: column;            align-items: center;            justify-content: center;            padding-bottom: 10em;          `}        >          <img            css={css`              height: 60px;              width: 60px;              border-radius: 30px;            `}            alt="ActiveUI logo"            src="./loading-background.svg"          />
          <h1            css={css`              font-size: 3em;            `}          >            Welcome to ActiveUI!          </h1>          <div            css={css`              width: 100%;              display: flex;              justify-content: center;            `}          >            <Form              name="basic"              labelCol={{ span: 8 }}              wrapperCol={{ span: 16 }}              autoComplete="off"              initialValues={formValues}              onValuesChange={(changedValues) => {                setFormValues({ ...formValues, ...changedValues });              }}            >              <Form.Item                label="Username"                name="username"                rules={[                  {                    required: true,                    message: "Please input your username!",                  },                ]}              >                <Input />              </Form.Item>
              <Form.Item                label="Password"                name="password"                rules={[                  {                    required: true,                    message: "Please input your password!",                  },                ]}              >                <Input.Password />              </Form.Item>
<Form.Item wrapperCol={{ offset: 8, span: 16 }}> <Button onClick={handleSubmit} type="primary"> Log in </Button> </Form.Item> </Form> </div> </div> </div> </div> );};Finally, we can wire our login form into src/withCustomAuthentication:
+ import { LoginForm, Credentials } from "./LoginForm";
  const Wrapped = (props: P) => {
-   const [credentials] = useState({-     username: "johndoe",-     token: "paste-your-token-here",-   });+   const [credentials, setCredentials] = useState<Credentials | undefined>(undefined);
    const userRoles = credentials ? getUserRoles(credentials.token) : [];
    const clients = useMemo<      | {          contentClient: ContentClient;          activePivot: {            [serverKey: string]: ActivePivotClient;          };        }      | undefined    >(() => {+     if (!credentials) {+       return undefined;+     }      const requestInit = {        headers: { authorization: `Bearer ${credentials.token}` },      }      return {        activePivot: {          "custom-server": createActivePivotClient({            url: window.env.activePivotServers["custom-server"].url,            version: {              id: "6",              restPath: "/pivot/rest/v6",              wsPath: "/pivot/ws/v6",            },            requestInit,          }),        },        contentClient: createContentClient({          url: window.env.contentServerUrl,          version: {            id: "5",            restPath: "/content/rest/v5",            wsPath: "/content/ws/v5",          },          requestInit,        }),      };    }, [credentials]);

+   if (!credentials) {+     return <LoginForm onLoggedIn={setCredentials} />;+   }
return ( <UserProvider value={{ username: credentials.username, userRoles }}> ... ); };There is one last problem remaining: log into the application and then refresh the page. You are prompted to log in again. This is unexpected. Let's fix it.
Local storage#
We can leverage the user's local storage in order to persist their username and token upon succesful login and initialize them from there, when the user refreshes the page.
In LoginForm.tsx, make the following edits:
- const [formValues, setFormValues] = useState<{-   username: string;-   password: string;- }>({-   username: "",-   password: "",- }));+ const [formValues, setFormValues] = useState<{+   username: string;+   password: string;+ }>(() => ({+   username: localStorage.getItem("activeui.username") ?? "",+   password: "",+ }));
  const handleSubmit = async () => {    const { username, password } = formValues;    const token = await authenticate(      "https://activeui-custom-authentication-server.activeviam.com:9090",      { username, password }    );
+   window.localStorage.setItem("activeui.username", username);+   window.localStorage.setItem("activeui.token", token);
onLoggedIn({ username, token }); };In withCustomAuthentication.tsx, make the following edits:
- const [credentials, setCredentials] = useState<Credentials | undefined>(undefined);+ const [credentials, setCredentials] = useState<Credentials | undefined>(+ () => {+ const username = localStorage.getItem("activeui.username");+ const token = localStorage.getItem("activeui.token");+ return username && token+ ? {+ username,+ token,+ }+ : undefined;+ }+ );