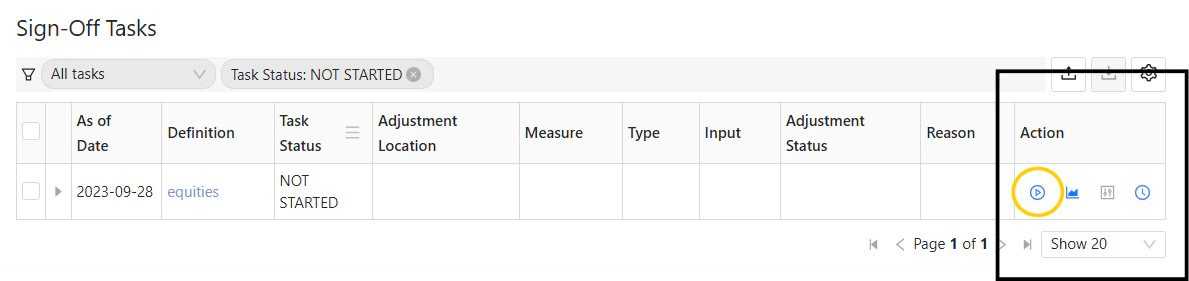
Start a task
When you are ready to start working with the data in a task, such as making adjustments and submitting the task for approval, the first step is starting your task. To start a task:- In the Tasks screen, find the required task in the list.
- In the Action column, click the “Start task” button.
Restart a task
If needed, at any point after the task is started, you can roll back the modifications and adjustments you have made and start again.- In the Tasks screen, find the required task in the list.
- In the Action column, click the “Restart task” button.
Atoti Sign-Off prompts you to confirm the action. You can also choose to retain or remove existing adjustments.
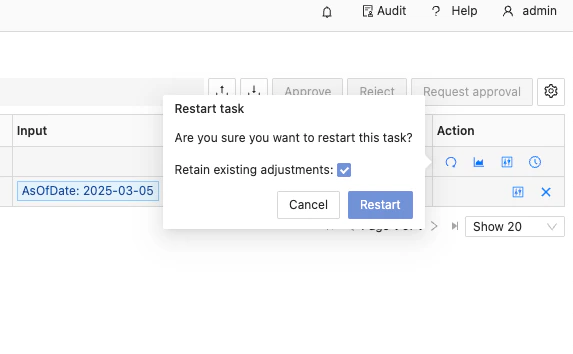
This dialog is customizable, so the content may differ depending on your implementation.
- Click Restart.
- Rolls back all adjustments (if choosing not to retain them)
- Takes a fresh snapshot of the data
- Reapplies any recurring adjustments
- Resets the task to
INITIATEDand returns it to your workflow
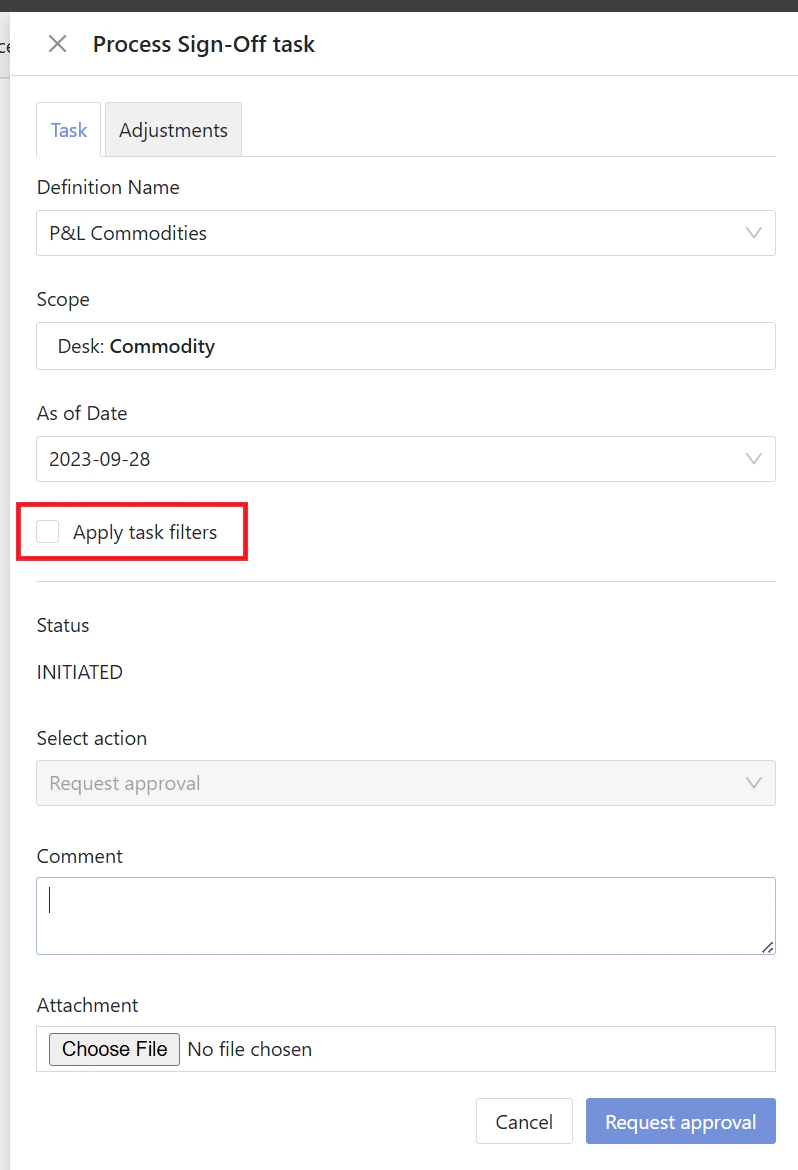
Request approval
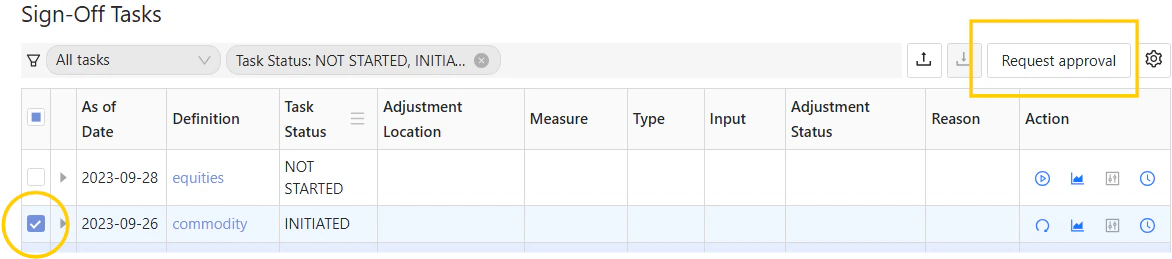
Once you have reviewed your adjustments to the data in your task, you can request approval the following way:- In the Tasks screen, mark the checkbox of each task you want to submit for approval.
- Click Request approval in the top right.
- In the dialog now displayed, check the details of your task, enter a comment if needed, then click Request approval.
Your task now moves to a
PENDINGstate until a designated approver approves or rejects it.
Approve or reject a task
To approve a task:- In the Tasks screen, mark the checkbox of each task you want to approve.
- Click Approve. This opens a dialog, where you can check the details of the selected tasks.
- Add a comment if needed. Any comment added here will be displayed in the task’s history.
INITIATED state.
If you need more information when reviewing your task, you can review the task alongside the dashboard data.
Using the task’s linked dashboard
- First, ensure the limit is linked to a dashboard. For instructions on how to do this, see Create task definitions in the UI.
- Click the “View linked dashboard” icon beside the task to open the relevant dashboard.
- Click Process task in the menu bar to review the task.
This opens a drawer where you can review the task, just as you would in the Tasks screen.

Using any dashboard
- Click Process task in the menu bar to open the drawer.
- Select a task among the available task definitions.
- Choose your action and submit it.