Configuring the widget
To turn on the File Upload widget, provide this code in the settings you register:Using the widget
To use File Upload:- Add the files you want to upload into the relevant directory in the stage folder, located in
mr-application/src/test/resources/data/. The files you add here are then displayed in the File Upload widget. - In the top menu, click Insert > Widgets. This opens the list of available widgets.
- From the list, drag and drop the File Upload widget to your dashboard.
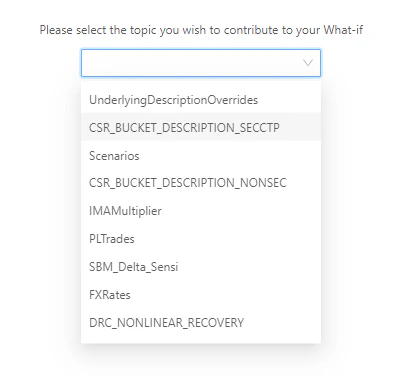
- Click the dropdown to select from a list of topics which are configured and have available data. For details on how to configure the topics, see Configuring the widget.
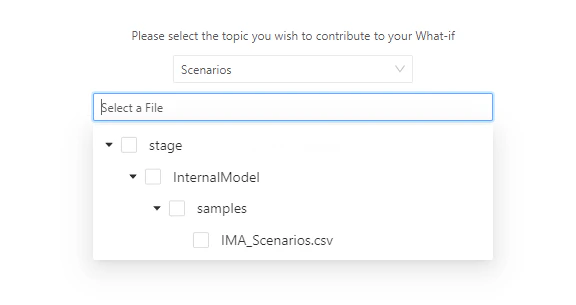
- Next, select a file. Below the topic selector you can expand a directory structure containing the files available for the upload associated with the selected topic.
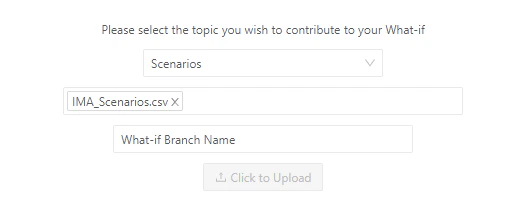
- Once you’ve selected the required files, enter a name for your branch in the What-if Branch Name field, then click Click to Upload.
You can only create or modify a branch if you have the required permissions. By default, only the creator of the branch can modify it.
