View, edit, and delete limits
The Limits Inventory allows you to carry out the following tasks:
- View, edit, and delete limits.
- Check a limit definition’s audit and exception history
- Approve or reject pending limit actions, such as limit changes and deletion.
View a limit
To view a Limit, click the View button located at the end of a limit’s row in the Inventory table. This opens the Limits definition (the same drawer you use to create a limit) with all form fields pre-populated with the limit you want to view. Click the Cancel button at the bottom to close the panel.
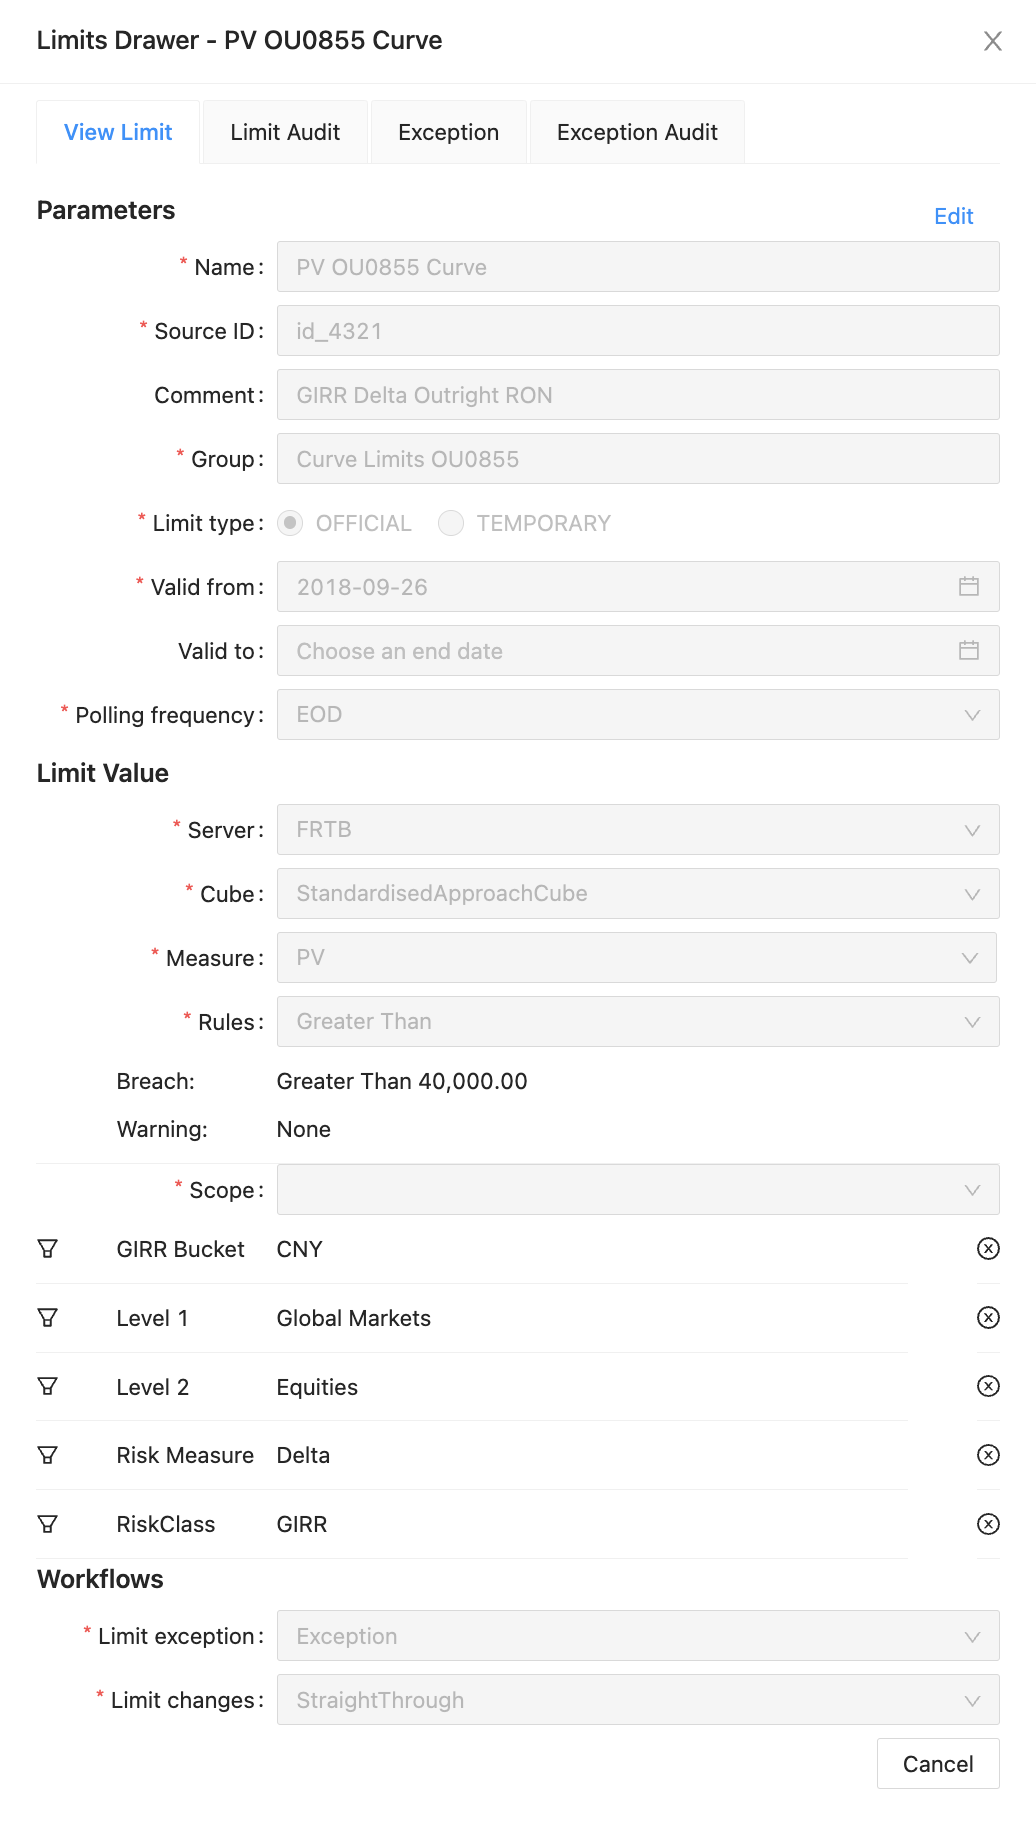
Click the Cancel button at the bottom to close the panel.
Edit a limit
Only limits that are in the Initiated or Approved state can be edited.
To edit a limit:
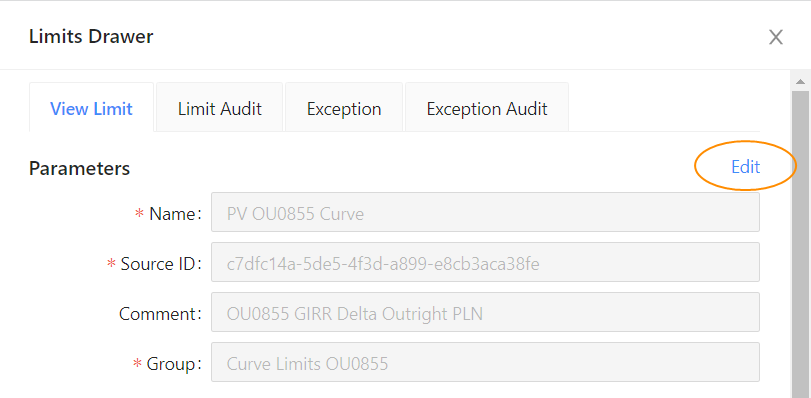
- Click the View action on any of the limit you would like to edit. This opens the Limits definition.
- At the top right of the Limits definition you will see an Edit button. If authorized, click this to modify some of the fields inside of the Limits definition.
- Once you’ve made your changes, click Update Limit at the bottom of the drawer.
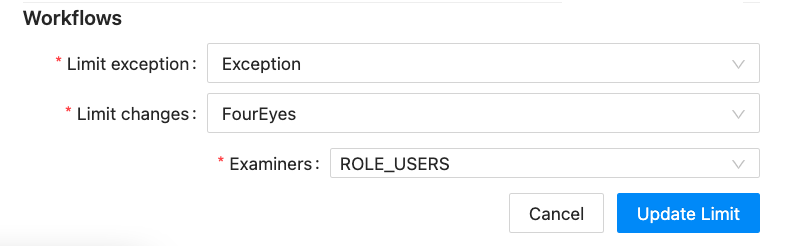
After updating the limit, the workflow state of the limit will depend on the Limit Changes workflow that was specified during the creation of the limit.
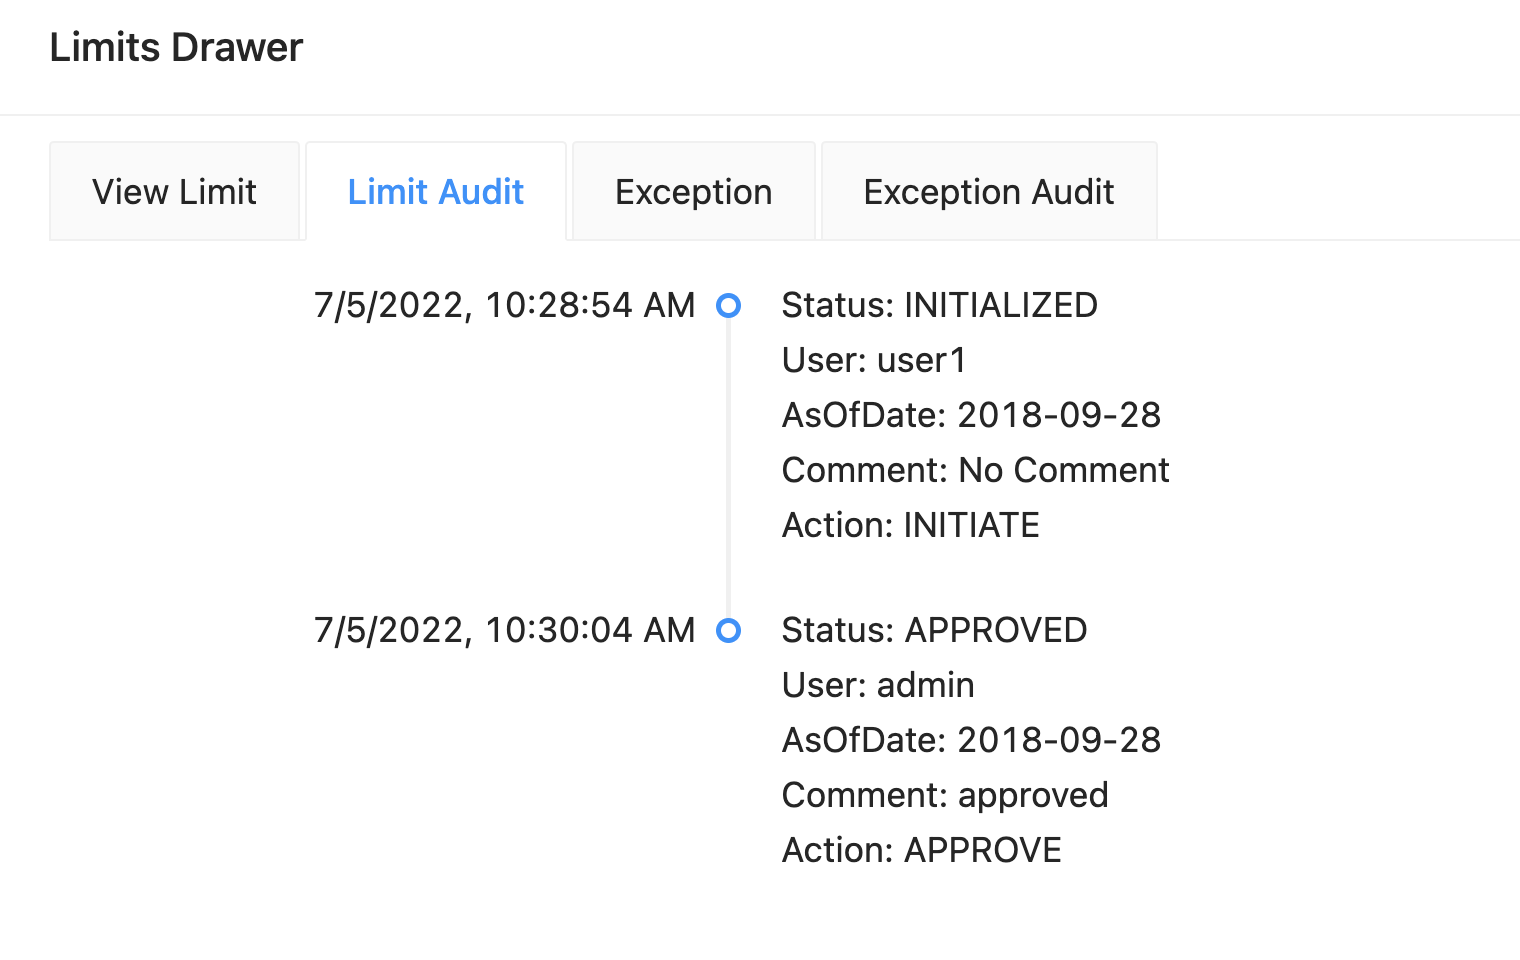
View the audit history
At the top of the drawer, click the Limit Audit tab to see the audit history of the selected limit. Here you can find details on when and who created and approved the limit, and any comments that were added during the process.
Delete a limit
There are a few limitations to deleting a limit:
- The limit must be in a state other than the final state of the workflow. Usually, these are the
InitializedorApprovedstates. - For the StraightThrough limit change workflow type, the limit is immediately deleted.
- For the FourEyes limit change workflow type, deleting the limit results in a
Pending Deletionstate, and it has to be approved for it to be deleted. The active user must be authorized to approve the deletion of the limit.
StraightThrough workflow
To delete a limit using the StraightThrough workflow type:
-
Open the Limits Inventory.
-
In the Actions column of the Limit table, click Delete.

- When prompted to confirm the deletion, click OK.
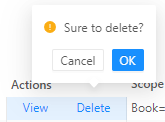
The limit is deleted from the datastore. If no other limits are using the KPI associated with the deleted limit, the KPI is also removed.
FourEyes workflow
-
In the Actions column of the Limit table, click Delete.
-
When prompted to confirm the deletion, click OK. This moves the limit into the
Pending Deletionstate
Once in the Pending Deletion state, an authorized user must approve the deletion of the limit. To do this:
-
Open the Limits Inventory.
-
In the Actions column of the Limit table, click View. This displays the limit definition.
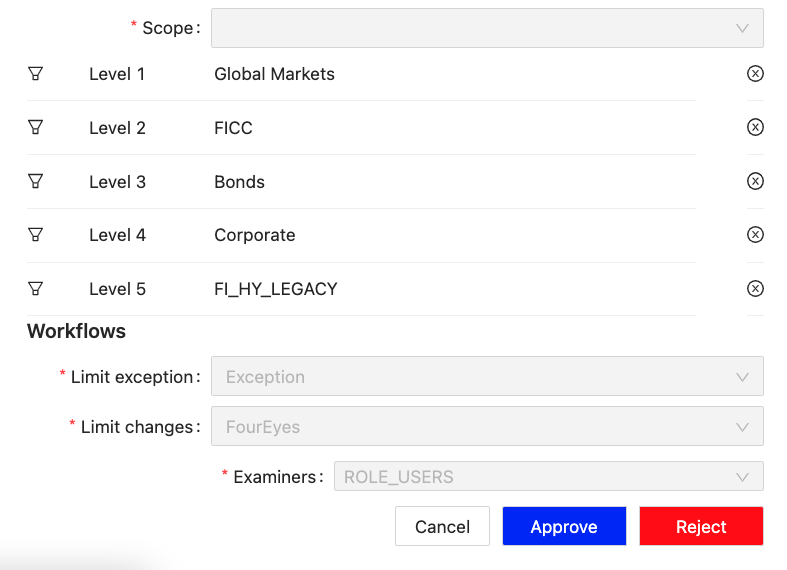
- Click Approve at the bottom. The limit is deleted from the datastore. If no other limits are using the KPI associated with the deleted limit, the KPI is also removed.
note
Anyone can delete a limit, but only authorized users can approve the deletion of a limit. The Approve button is disabled for unauthorized users.
note
The Limit Status of an edited limit will stay in Approved, but the draft limit status will be Edit, as it is in an edit state.