Reclassifying Portfolios
The Accelerator provides simulations to display instant recalculations of and incremental impact on all calculations as a result of reclassifying a given book in the book/desk hierarchy.
By simply dragging a book from one point in the hierarchy to another, you can immediately see the potential impact on the VaR/ ES or sensitivities, for example.
Accessing the Book Hierarchy widget
You can reclassify books or desks using the Custom FRTB Book Hierarchy widget. To open it: from the Add new widgets list, select the Custom FRTB Book Hierarchy widget from the WhatIf Simulations category.
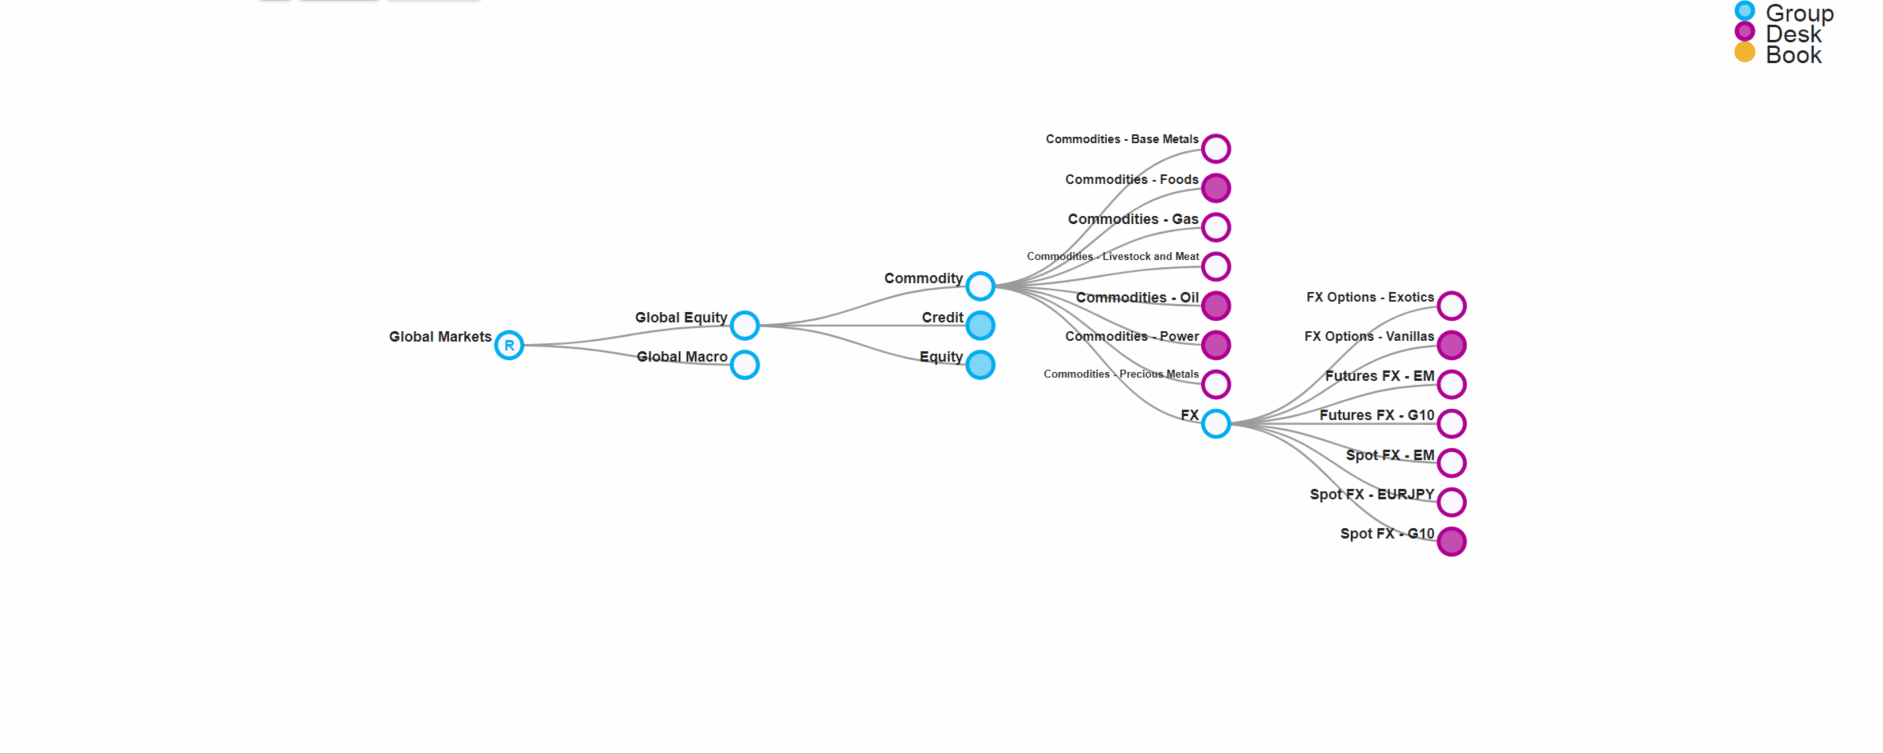
The book hierarchy is displayed as a horizontal tree structure. When a new tree loads, the root node (indicated by ‘R’) is open, but its immediate children nodes are closed.

To expand a node, click on it. This reveals the node’s children. To reveal all descendants of a node, right-click the node and select Expand Entire Subtree.
To focus the view on a single node and hide all other nodes, right-click the node and click Toggle Focus.
To pan the view, left-click and drag in the window. To zoom in to an area, use the mouse scroll-wheel.
Filtering a node’s children
You can filter a node’s children using a specific string:
-
Right-click the parent node, and from the context menu, select Filter Children. This opens the What Children Do You Want To Filter On? dialog.
-
Enter the string and click OK. This leaves only the children nodes matching the string visible. The parent node’s center is colored magenta, and a label displays the string used as the filter.

Running a reclassification simulation
-
Use your mouse to expand the nodes of the book hierarchy until you reach the one you want to work on. Then click and drag the specified node to where you want it.
If the destination node is too far or you want to move a large number of nodes at once, you can cut and paste the nodes by **Shift**+clicking the node or using the right-click context menu. </br>For more information, see [Cutting and pasting nodes](#Cutting).</br>Every desk must belong to only one group and the hierarchy of groups/desks/books is enforced (i.e. you cannot move a book between a group and a desk).
-
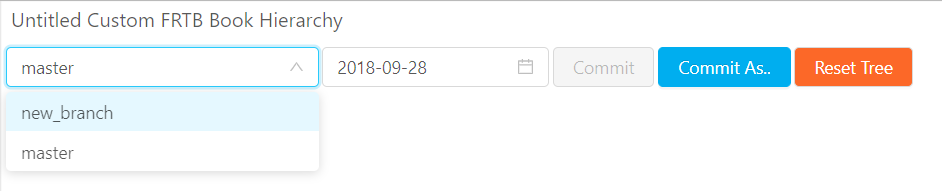
Select the branch on which you want to run your simulation or click Commit As… to initiate a new one.
-
In the What Branch Do You Want To Create dialog box, enter the name for your new branch, and click OK.
-
Use the calendar dropdown to select an AsOfDate.
-
To save your changes in your branch, click Commit then give your changes a name in the What Should This Save Submission’s Definition Be dialog box.
Cutting and pasting nodes
When you want to move a large number of nodes or the destination node is far away, drag-and-drop may not be practical. In such cases, you can cut and paste nodes by right-clicking the node and using the context menu options, or using the keyboard shortcuts.
-
To cut a node, Shift+click it, or right-click and select Cut from the context menu. The node becomes transparent to indicate that it’s cut.
To undo cutting a node, Shift+click the node again, or right-click and select Un-Cut from the context menu. To uncut all nodes simultaneously click Stop Cutting.
-
Right-click the destination node, and in the context menu, click Paste: [node name].
To undo cutting a node, Shift+click the node again, or right-click and select Un-Cut from the context menu.
Best practices for opening nodes
The widget can support hundreds of nodes open at once, but after a point, open nodes can slow the widget down. We recommend having a maximum of 800 nodes open at any time. The widget displays warnings when thresholds are violated.
Closing parts of the tree you’re not working on also helps focus on the parts you want to modify.
-