> ## Documentation Index
> Fetch the complete documentation index at: https://docs.activeviam.com/llms.txt
> Use this file to discover all available pages before exploring further.
# Admin UI
## Overview
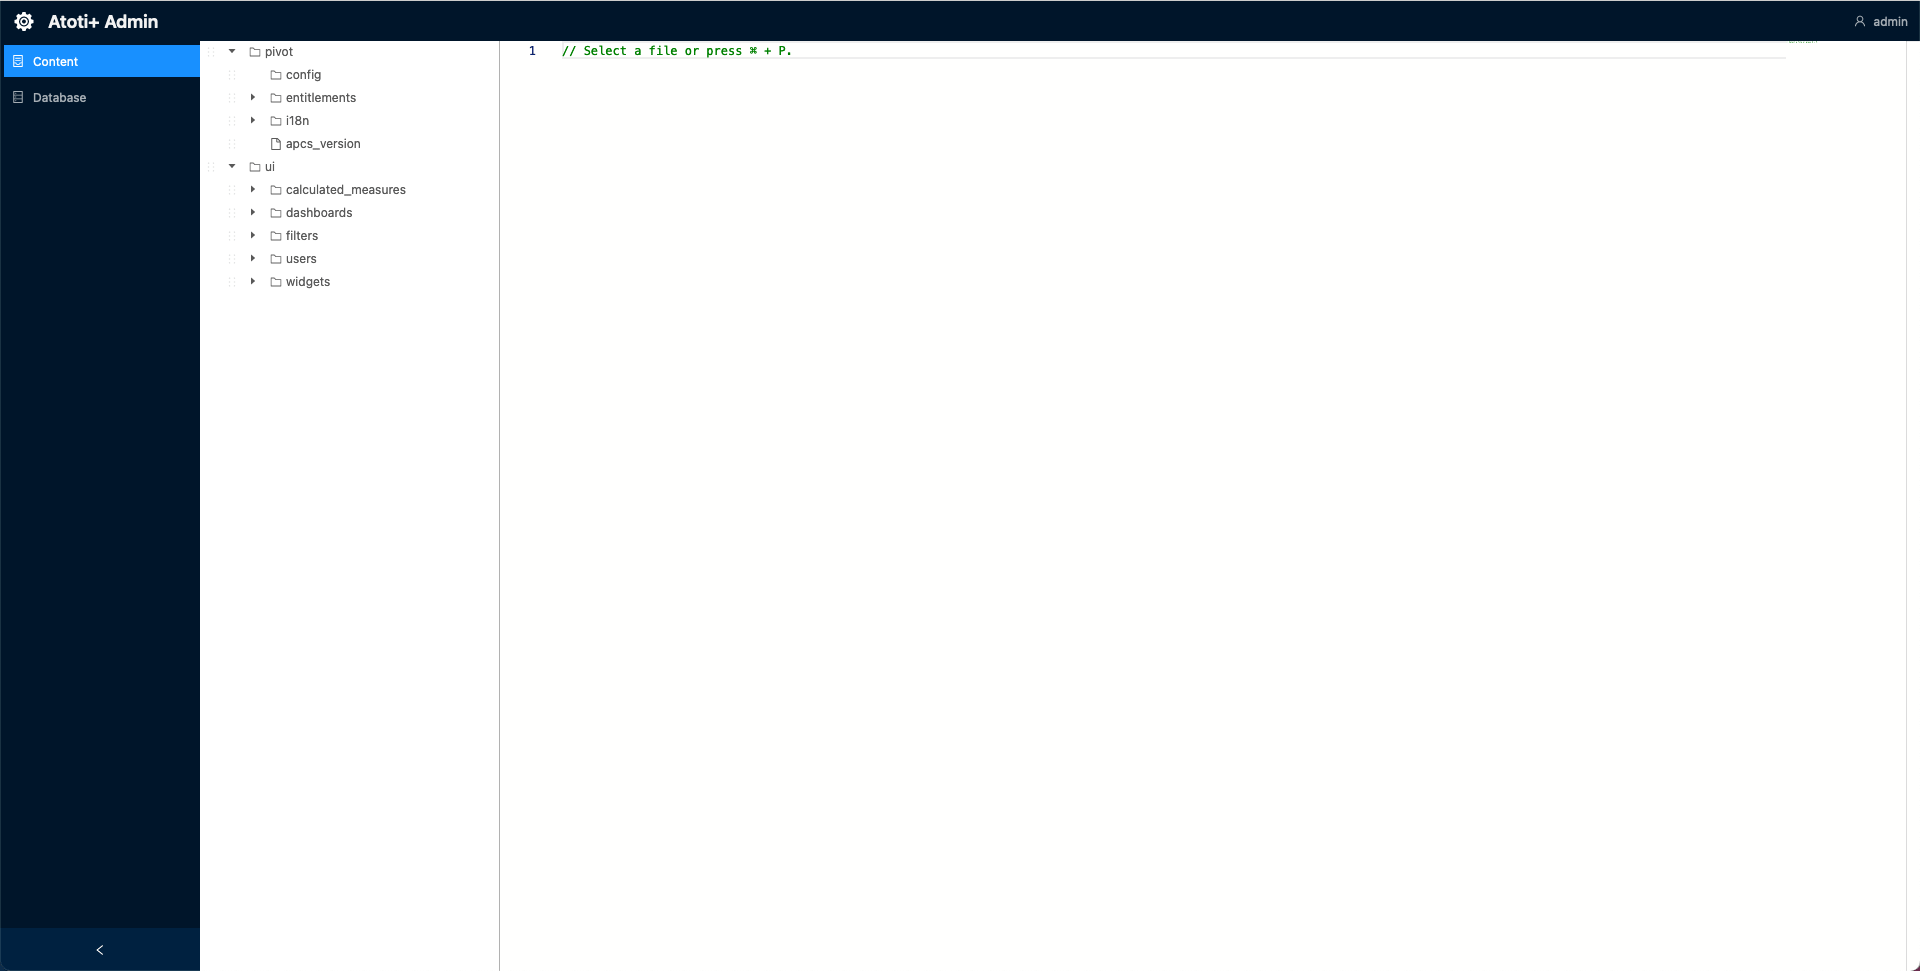
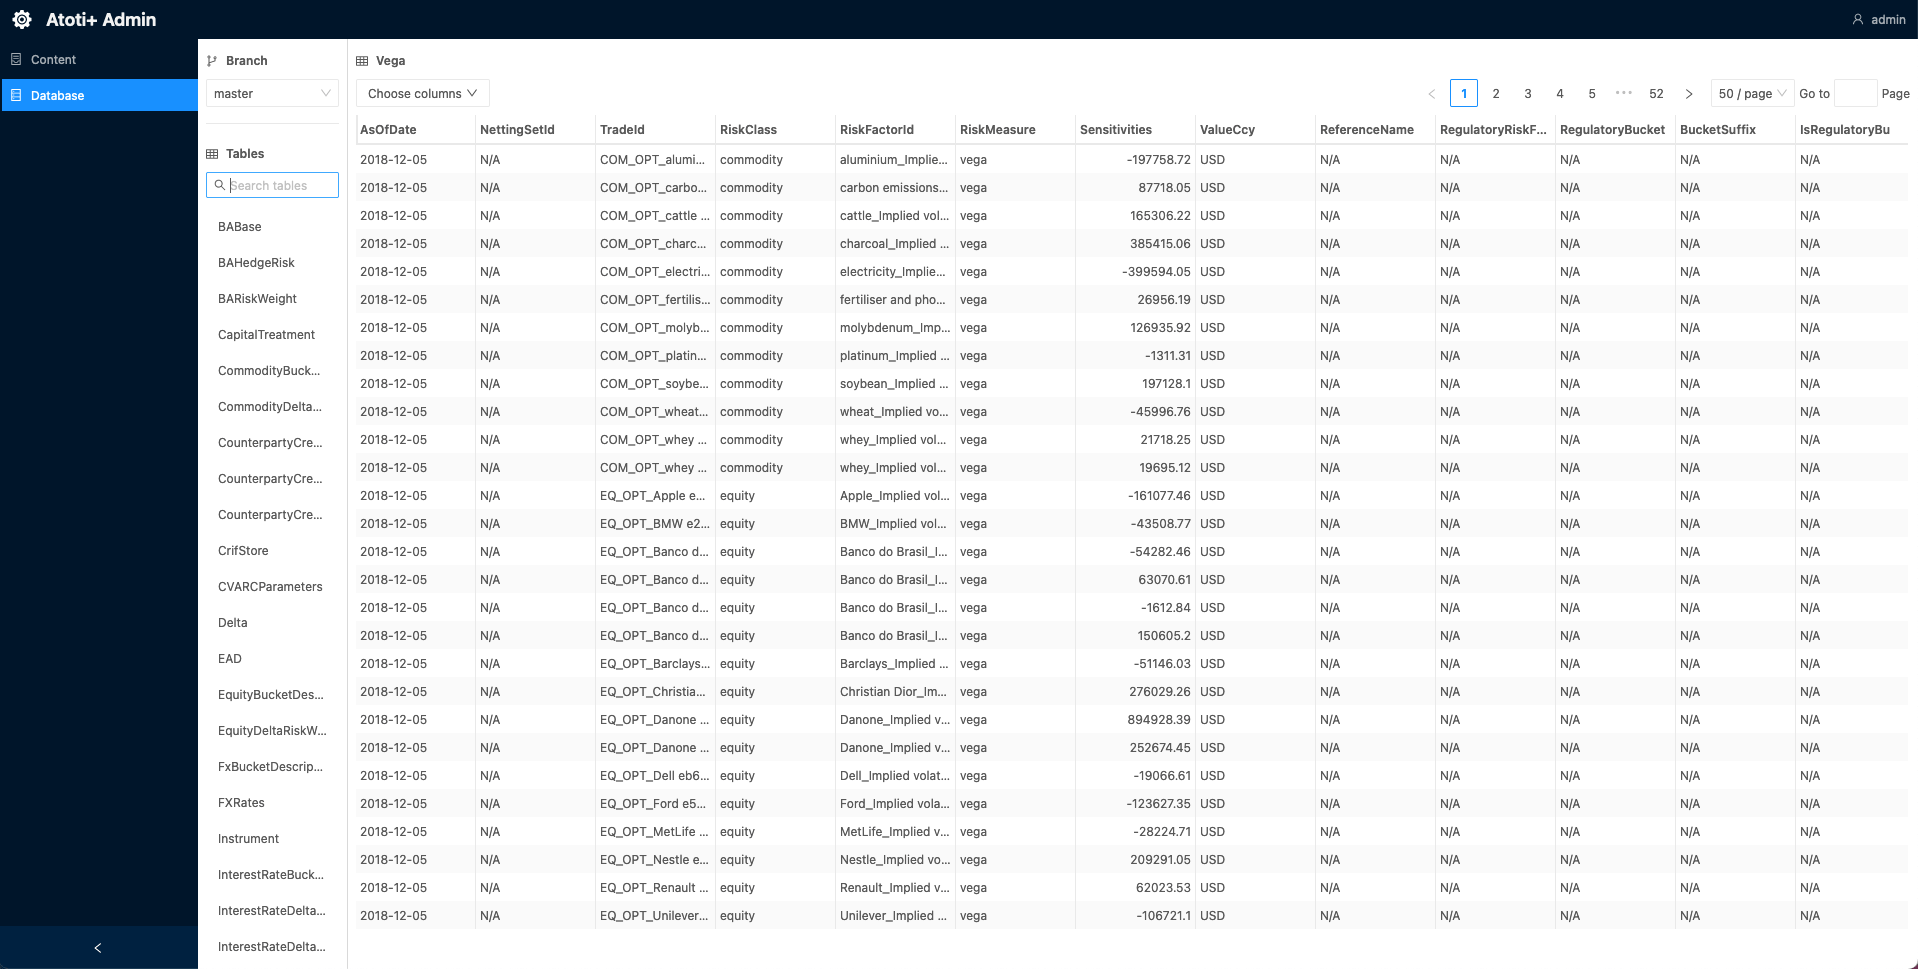
The Admin UI is a user interface to interact with the Content Server and view the contents of the Datastore. For more details, see the [Atoti Server documentation](/engine/java-sdk/6.1/content_server/cs_overview#admin-ui).
 ## Configuration
The Admin UI dependency is imported into the application by default.
Here's how to set it up:
1. Create a new directory, `admin-ui`, within `./src/main/resources/static`.
2. Add the `env.js` file to `/static/admin-ui` directory:
```javascript theme={"languages":{"custom":["/engine/python-sdk/0.9/languages/pycon.tmLanguage.json"]}}
var baseUrl = (window.serverUrl = location.protocol + "//" + window.location.host + "/");
var atotiServerVersion = "6.0.0";
window.env = {
contentServerUrl: baseUrl,
contentServerVersion: atotiServerVersion,
activePivotServers: {
frtb: {
url: baseUrl,
version: atotiServerVersion,
},
},
};
```
3. Import the `env.js` as a static resource. This can be accomplished by registering a new static resource handler to our `ResourceHandlerRegistry`.
Here is a snippet of how to add a new static resource with the `ResourceHandlerRegistry` fluent API:
```java theme={"languages":{"custom":["/engine/python-sdk/0.9/languages/pycon.tmLanguage.json"]}}
@Configuration
public class StaticResourcesHandler implements WebMvcConfigurer {
// Env.js location within the project
public static final String ADMIN_UI_DIRECTORY = "/static/admin-ui/";
// The Admin UI url path
public static final String ADMIN_UI_PATH = "/admin/ui/";
@Override
public void addResourceHandlers(final ResourceHandlerRegistry registry) {
LoggerFactory.getLogger(StaticResourcesHandler.class.getCanonicalName()).info("Loading static resources");
// Adding the Admin UI as a static resource
registry.addResourceHandler(ADMIN_UI_PATH + "env*.js")
.addResourceLocations("classpath:" + ADMIN_UI_DIRECTORY)
.resourceChain(true)
// Resolve env.js to the temp file with the custom port
// Could also just use {window.host}:{window.port} ?
.addResolver(new EnvJsResourceResolver(tempEnvJsGenerator("classpath:" + ADMIN_UI_DIRECTORY)))
.addResolver(new EncodedResourceResolver())
.addResolver(new PathResourceResolver());
}
}
```
4. Configure security for the Admin UI. This can be done in its own configuration class by creating a new `SecurityFilterChain` bean.
The Admin UI is secured by default, so you need to configure the security to allow access to the Admin UI.
Here is an example of how to configure the security for the Admin UI:
```java theme={"languages":{"custom":["/engine/python-sdk/0.9/languages/pycon.tmLanguage.json"]}}
@Configuration
public class SecurityConfig {
@Bean
public SecurityFilterChain adminUIFilterChain(HttpSecurity http) throws Exception {
return http
.securityMatcher(url(StaticResourcesHandler.ADMIN_UI_PATH, WILDCARD))
.authorizeHttpRequests(auth -> auth
.requestMatchers(HttpMethod.OPTIONS, url(StaticResourcesHandler.ADMIN_UI_PATH, WILDCARD))
.permitAll()
.anyRequest()
.hasAnyAuthority(ROLE_ADMIN)
)
.securityContext((sc) -> sc.requireExplicitSave(false))
.with(jwtAuthenticationConfigurer, Customizer.withDefaults())
.build();
}
}
```
The Admin UI is now ready to be used.
## Accessing the Admin UI
To access the Admin UI, after starting up Atoti FRTB, navigate to the URL below and enter your credentials: `http://localhost:8080/frtb-starter/admin/ui/index.html`
## Configuration
The Admin UI dependency is imported into the application by default.
Here's how to set it up:
1. Create a new directory, `admin-ui`, within `./src/main/resources/static`.
2. Add the `env.js` file to `/static/admin-ui` directory:
```javascript theme={"languages":{"custom":["/engine/python-sdk/0.9/languages/pycon.tmLanguage.json"]}}
var baseUrl = (window.serverUrl = location.protocol + "//" + window.location.host + "/");
var atotiServerVersion = "6.0.0";
window.env = {
contentServerUrl: baseUrl,
contentServerVersion: atotiServerVersion,
activePivotServers: {
frtb: {
url: baseUrl,
version: atotiServerVersion,
},
},
};
```
3. Import the `env.js` as a static resource. This can be accomplished by registering a new static resource handler to our `ResourceHandlerRegistry`.
Here is a snippet of how to add a new static resource with the `ResourceHandlerRegistry` fluent API:
```java theme={"languages":{"custom":["/engine/python-sdk/0.9/languages/pycon.tmLanguage.json"]}}
@Configuration
public class StaticResourcesHandler implements WebMvcConfigurer {
// Env.js location within the project
public static final String ADMIN_UI_DIRECTORY = "/static/admin-ui/";
// The Admin UI url path
public static final String ADMIN_UI_PATH = "/admin/ui/";
@Override
public void addResourceHandlers(final ResourceHandlerRegistry registry) {
LoggerFactory.getLogger(StaticResourcesHandler.class.getCanonicalName()).info("Loading static resources");
// Adding the Admin UI as a static resource
registry.addResourceHandler(ADMIN_UI_PATH + "env*.js")
.addResourceLocations("classpath:" + ADMIN_UI_DIRECTORY)
.resourceChain(true)
// Resolve env.js to the temp file with the custom port
// Could also just use {window.host}:{window.port} ?
.addResolver(new EnvJsResourceResolver(tempEnvJsGenerator("classpath:" + ADMIN_UI_DIRECTORY)))
.addResolver(new EncodedResourceResolver())
.addResolver(new PathResourceResolver());
}
}
```
4. Configure security for the Admin UI. This can be done in its own configuration class by creating a new `SecurityFilterChain` bean.
The Admin UI is secured by default, so you need to configure the security to allow access to the Admin UI.
Here is an example of how to configure the security for the Admin UI:
```java theme={"languages":{"custom":["/engine/python-sdk/0.9/languages/pycon.tmLanguage.json"]}}
@Configuration
public class SecurityConfig {
@Bean
public SecurityFilterChain adminUIFilterChain(HttpSecurity http) throws Exception {
return http
.securityMatcher(url(StaticResourcesHandler.ADMIN_UI_PATH, WILDCARD))
.authorizeHttpRequests(auth -> auth
.requestMatchers(HttpMethod.OPTIONS, url(StaticResourcesHandler.ADMIN_UI_PATH, WILDCARD))
.permitAll()
.anyRequest()
.hasAnyAuthority(ROLE_ADMIN)
)
.securityContext((sc) -> sc.requireExplicitSave(false))
.with(jwtAuthenticationConfigurer, Customizer.withDefaults())
.build();
}
}
```
The Admin UI is now ready to be used.
## Accessing the Admin UI
To access the Admin UI, after starting up Atoti FRTB, navigate to the URL below and enter your credentials: `http://localhost:8080/frtb-starter/admin/ui/index.html`