Set up
Atoti UI is an off-the-shelf web application allowing users to create and share real-time dashboards, based on large amounts of data stored in Atoti.
It is extensible via plugins.
The Atoti JavaScript API is the TypeScript library behind Atoti. It exports building blocks, usable in any application.
Install your tools
Make sure you have the following installed:
- NodeJS version 18.12.1 or greater
Log into Artifactory
You need to download the appropriate artifacts from our Artifactory.
In the left bar, expand the activeui-generic-release folder. Inside that, expand the latest available release folder.
To download ActiveViam artifacts you need credentials to access our private JFrog Artifactory. Raise a support ticket to request these if needed.
Use Atoti UI
There are three ways to get started with Atoti UI.
- Use Atoti UI with no customizations.
- Use Atoti UI with customizations.
- Integrate Atoti UI components into an existing application.
Use Atoti UI with no customizations
- Download atoti-ui-starter-5.2.19.zip from Artifactory.
- Unzip it.
- Edit env.js to fill in your Atoti Server and Content Server URLs.
Use Atoti UI with customizations
Download the artifact called "atoti-ui-starter-source-5.2.19.zip".
In the terminal, run the following command:
npm install
This installs the Atoti UI starter. In particular, it downloads all the dependencies our project needs.
The first time you run it, you will encounter the following error:
An unexpected error occurred: "https://registry.yarnpkg.com/@activeviam/atoti-ui-scripts: Not found".
This is expected: @activeviam modules are published to Artifactory, not NPM.
To fix this, run the following command where {username} and {password} must be replaced with your ActiveViam credentials:
- Bash
- Windows cmd
curl -u '{username}:{password}' https://activeviam.jfrog.io/artifactory/developer-guide/reference/npm/activeui-npm-release/auth/activeviam >> ~/.npmrc
curl -u "{username}:{password}" https://activeviam.jfrog.io/artifactory/developer-guide/reference/npm/activeui-npm-release/auth/activeviam >> %USERPROFILE%\.npmrc
After running this command, your .npmrc file should include the following lines:
@activeviam:registry=https://activeviam.jfrog.io/artifactory/developer-guide/reference/npm/activeui-npm-release/
//activeviam.jfrog.io/artifactory/developer-guide/reference/npm/activeui-npm-release/:_password={base64_encoded_password}
//activeviam.jfrog.io/artifactory/developer-guide/reference/npm/activeui-npm-release/:username={username}
//activeviam.jfrog.io/artifactory/developer-guide/reference/npm/activeui-npm-release/:email={email}
//activeviam.jfrog.io/artifactory/developer-guide/reference/npm/activeui-npm-release/:always-auth=true
From here you can extend your application or create customizations.
Integrate Atoti UI components into an existing application
See the following documentation page for a step by step guide.
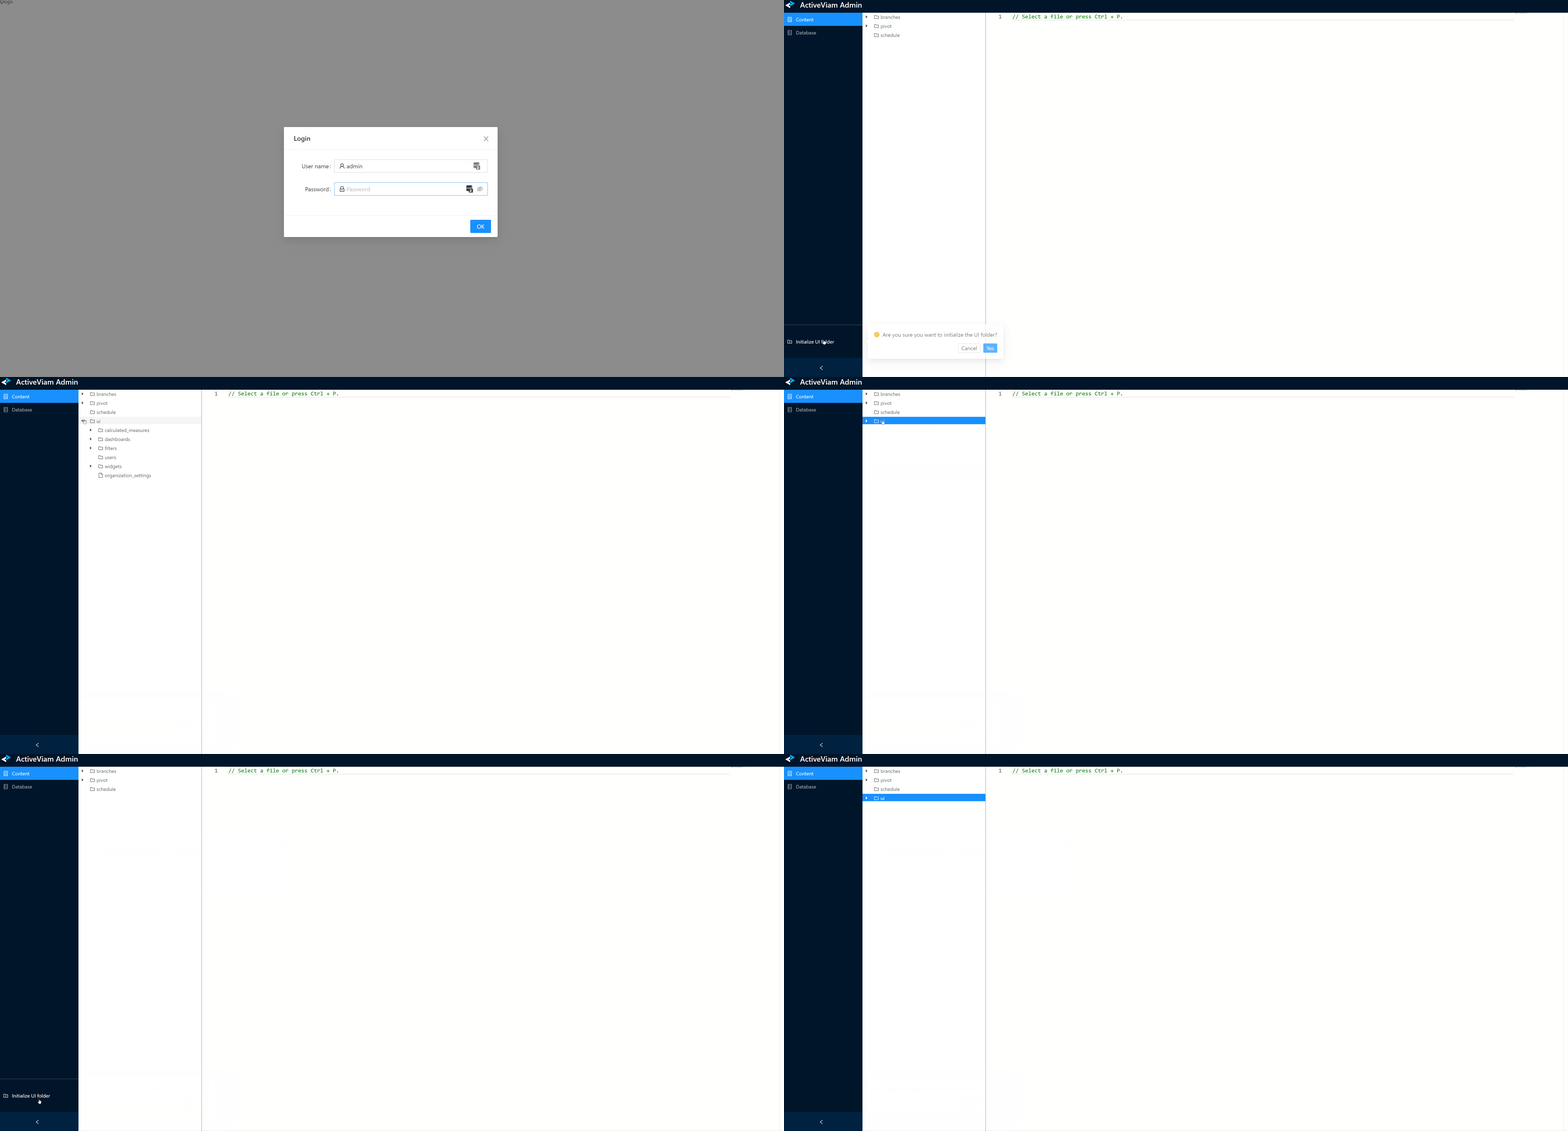
Initialize the Content Server.
- Edit
env.jsto fill in your Atoti Server and Content Server URLs.
If your server is based on the Atoti Server sandbox, then these 2 URLs are likely to be identical.
This can be done by connecting to the Atoti Admin UI (usually accessible at /admin under your server URL) as a user with admin privileges, and using the dedicated button as shown below:
