> ## Documentation Index
> Fetch the complete documentation index at: https://docs.activeviam.com/llms.txt
> Use this file to discover all available pages before exploring further.
# ActivePivot Excel Add-in: enhance your experience of Atoti in Excel
## Introduction
The ActivePivot Excel Add-in is used to bring some extra functionalities to the Excel experience. These functionalities are readily
available in Atoti UI:
* Allow the users to drillthrough into special datagrids and widgets in Excel and bypass the Excel row limit;
* Refresh the pivot table when real-time updates occur
* Move through sliced filters more easily using next and previous buttons
* View and configure context values
* View MDX queries executed by the pivot table
## Installation
The Excel Add-in is released and installed thanks to a setup.exe file and an accompanying MSI file.
Dependency Information (Shipped as DLLs with the installer):
* Antlr3
* VSTO 4.0
* .NET Framework 4
**After logging in JFrog Platform**, the setup files can be downloaded
from [Artifactory](https://activeviam.jfrog.io/ui/repos/tree/General/activepivot-generic-release/excel-addin).
The version 6.0 is compatible with Atoti Server 6.0, while the version 5.11 is compatible with
Atoti Server 5.11 and ulterior versions.
Run the setup.exe file with Excel closed. It will prompt the set-up wizard that will guide you through the installation.
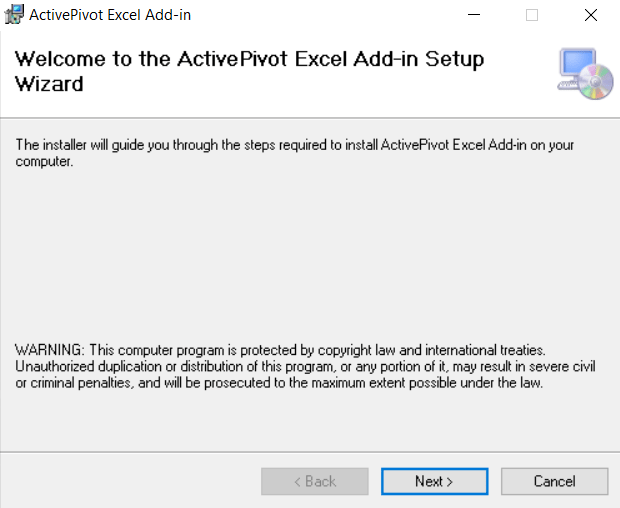 Once the add-in has been installed, it is ready to use. You can check that the add-in has been successfully
installed by starting Excel and checking that the Ribbon has a new section called ActivePivot.
Once the add-in has been installed, it is ready to use. You can check that the add-in has been successfully
installed by starting Excel and checking that the Ribbon has a new section called ActivePivot.
 ## ActivePivot Configuration
To use the add-in, your Atoti Server needs to expose the spreadsheet service as a rest service: to do that
add the `SpreadsheetRestServiceController.class` to the import list of `ActivePivotRestServicesConfig` if
it is not present.
The `SpreadsheetRestServiceController` is an internal REST service and should not be used directly by
client applications. We intentionally avoid any mention of this service in the REST API documentation.
## How to use the add-in
### Introduction
First, you need to connect Excel with ActivePivot as explained in the section [Front ends](./front_ends/user_guide_querying_front_ends_overview). Then, each
additional functionality of the ActivePivot add-in will be available from both the Ribbon section "ActivePivot" and the
context menu of a valid pivot table.
## ActivePivot Configuration
To use the add-in, your Atoti Server needs to expose the spreadsheet service as a rest service: to do that
add the `SpreadsheetRestServiceController.class` to the import list of `ActivePivotRestServicesConfig` if
it is not present.
The `SpreadsheetRestServiceController` is an internal REST service and should not be used directly by
client applications. We intentionally avoid any mention of this service in the REST API documentation.
## How to use the add-in
### Introduction
First, you need to connect Excel with ActivePivot as explained in the section [Front ends](./front_ends/user_guide_querying_front_ends_overview). Then, each
additional functionality of the ActivePivot add-in will be available from both the Ribbon section "ActivePivot" and the
context menu of a valid pivot table.
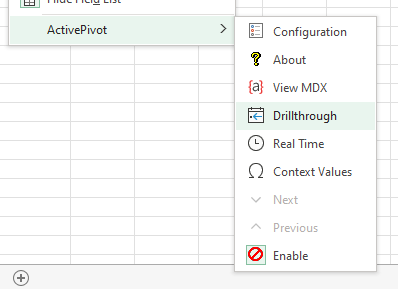 At the first use, the add-in will prompt you for authentication to
ActivePivot. For security reasons, the add-in cannot use the connection established by Excel and will need its own
authentication.
Let's see what you can do with the ActivePivot Excel Add-in from left to right in the ribbon.
### Enable
The Enable button allows to enable or disable the add-in.
### About
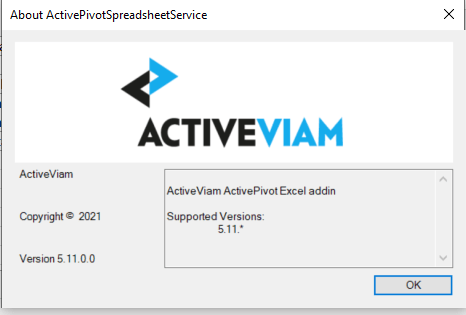
The About button opens a pop-up showing the add-in version and the versions of Atoti it is compatible with.
At the first use, the add-in will prompt you for authentication to
ActivePivot. For security reasons, the add-in cannot use the connection established by Excel and will need its own
authentication.
Let's see what you can do with the ActivePivot Excel Add-in from left to right in the ribbon.
### Enable
The Enable button allows to enable or disable the add-in.
### About
The About button opens a pop-up showing the add-in version and the versions of Atoti it is compatible with.
 ### Configuration
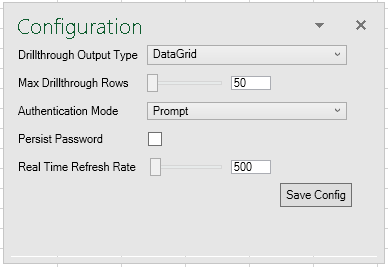
The configuration button opens a pop-up that allows you to choose different settings:
* the authentication method
* the drillthrough output type
* the refresh rate of the real time
Afterwards, close the pop-up.
### Configuration
The configuration button opens a pop-up that allows you to choose different settings:
* the authentication method
* the drillthrough output type
* the refresh rate of the real time
Afterwards, close the pop-up.
 ### Drillthrough
There is a native function for drillthrough in Excel. The add-in proposes an alternative drillthrough
function that:
* can use a context value `drillthrough.maxrows` to configure maximal number of rows in the output;
* can display the drillthrough result as a datagrid or a spreadsheet.
The `drillthrough.maxrows` limit can be configured from Excel with the [context values action](#context-values) of the add-in. The output
format of the drillthrough (datagrid or spreadsheet) can be chosen from the [configuration settings](#configuration). To enable the
real-time, click on the corresponding [action](#realtime).
#### How to create a new drillthrough
A drillthrough can be performed on a cell of a pivot table by either double-clicking on the cell or selecting the
cell and selecting the 'Drillthrough' option from the ribbon or the context menu. There are several kinds
drillthrough that can be performed, you can select the type by changing the 'Drillthrough Output Type' in the
[configuration settings](#configuration).
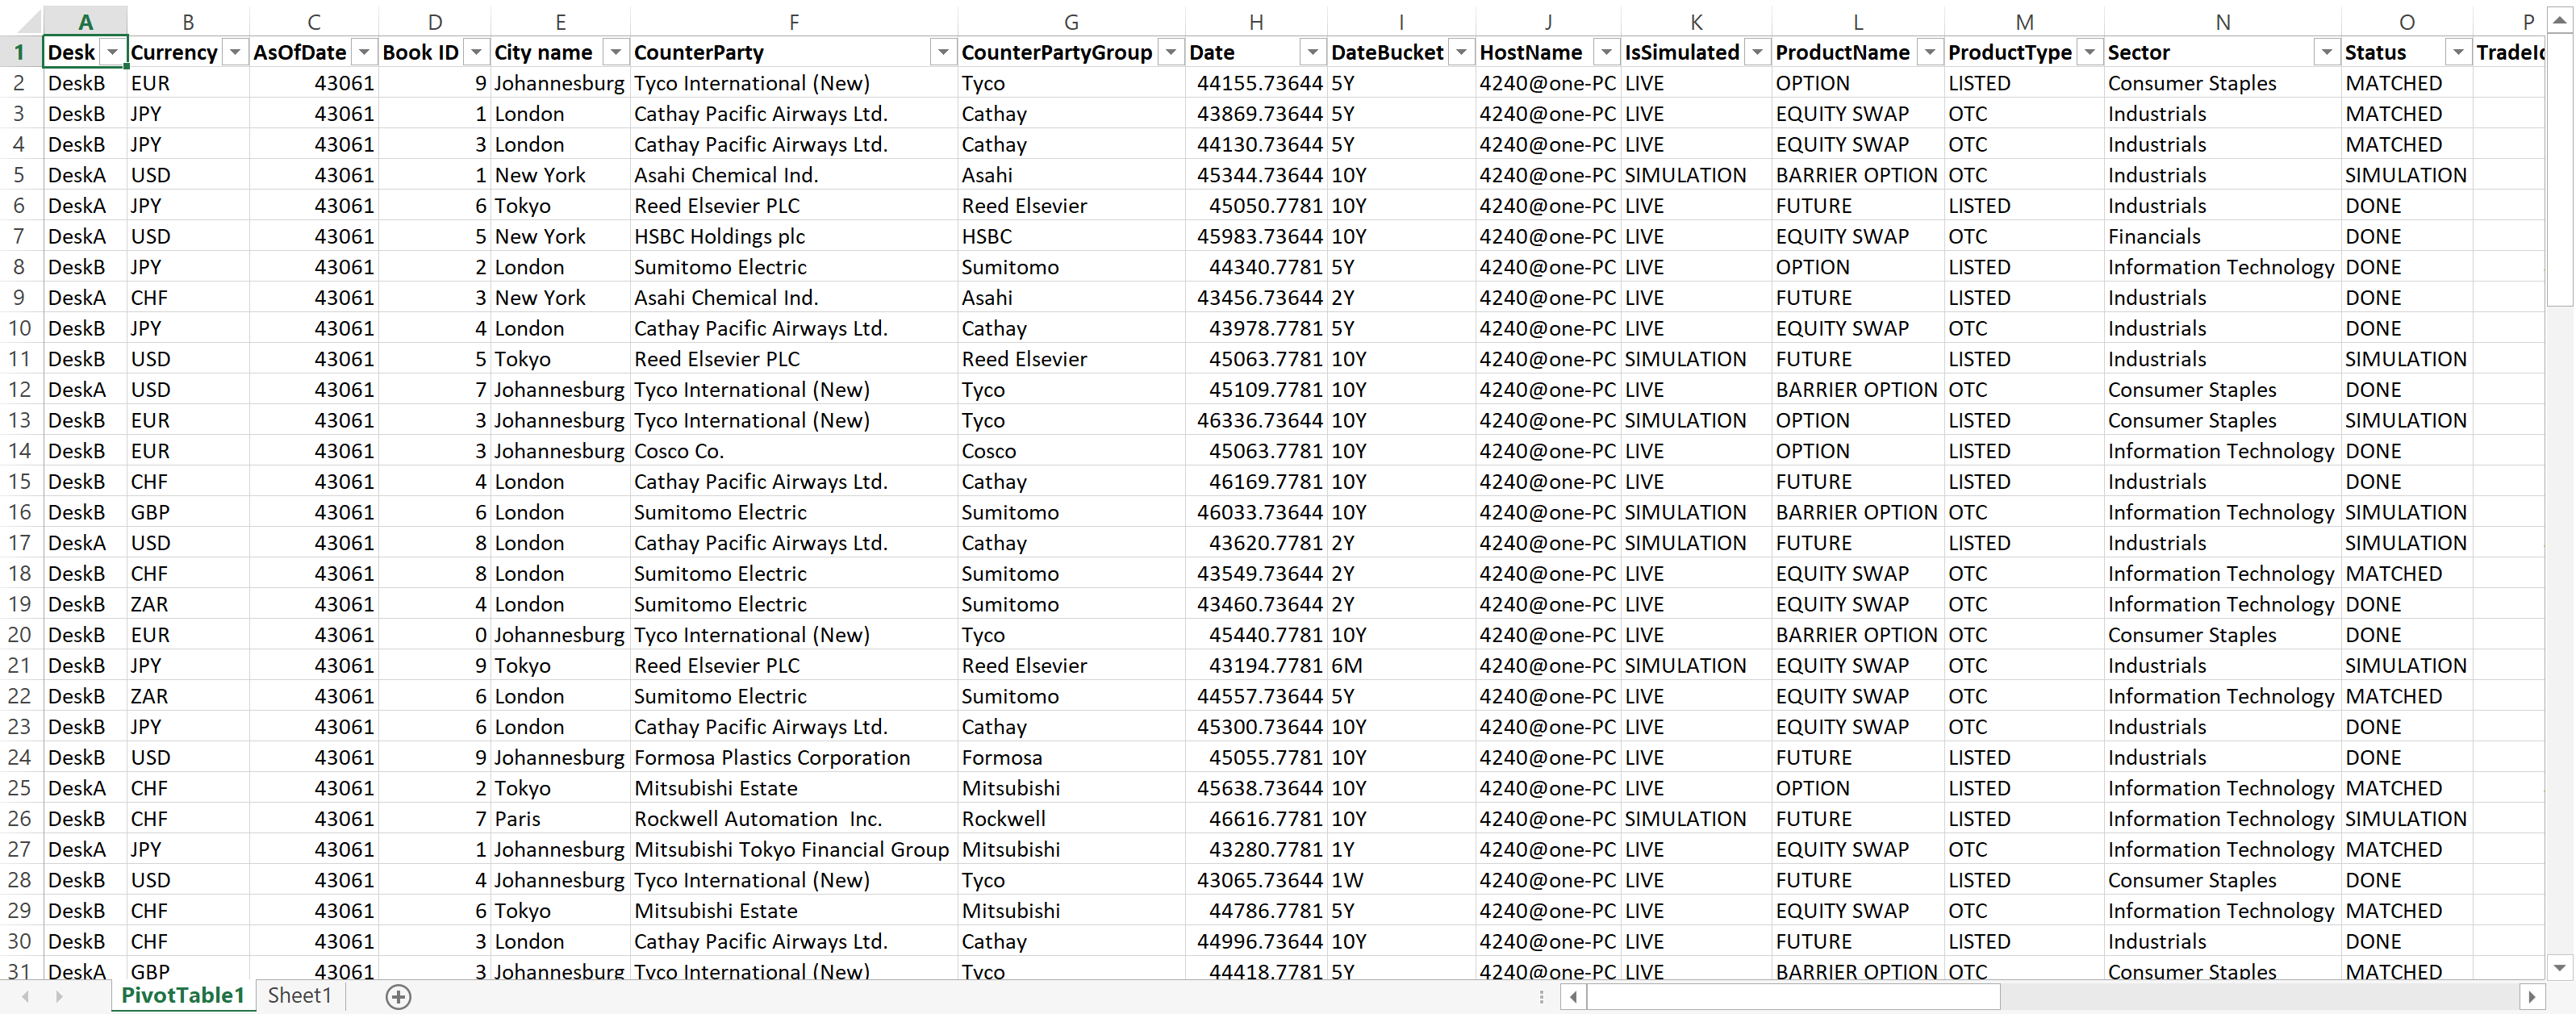
##### Spreadsheet Drillthrough
The spreadsheet drillthrough option is similar to the native drillthrough, but is not limited by the native Excel
drillthrough row limit. The drillthrough displays the number of rows based determined by the 'Max Drillthrough
Rows' context value, and opens the result in a new sheet:
### Drillthrough
There is a native function for drillthrough in Excel. The add-in proposes an alternative drillthrough
function that:
* can use a context value `drillthrough.maxrows` to configure maximal number of rows in the output;
* can display the drillthrough result as a datagrid or a spreadsheet.
The `drillthrough.maxrows` limit can be configured from Excel with the [context values action](#context-values) of the add-in. The output
format of the drillthrough (datagrid or spreadsheet) can be chosen from the [configuration settings](#configuration). To enable the
real-time, click on the corresponding [action](#realtime).
#### How to create a new drillthrough
A drillthrough can be performed on a cell of a pivot table by either double-clicking on the cell or selecting the
cell and selecting the 'Drillthrough' option from the ribbon or the context menu. There are several kinds
drillthrough that can be performed, you can select the type by changing the 'Drillthrough Output Type' in the
[configuration settings](#configuration).
##### Spreadsheet Drillthrough
The spreadsheet drillthrough option is similar to the native drillthrough, but is not limited by the native Excel
drillthrough row limit. The drillthrough displays the number of rows based determined by the 'Max Drillthrough
Rows' context value, and opens the result in a new sheet:
 We do not recommend to switch between the spreadsheets while executing this command due to internal Excel
limitations. Some data may be lost or corrupted.
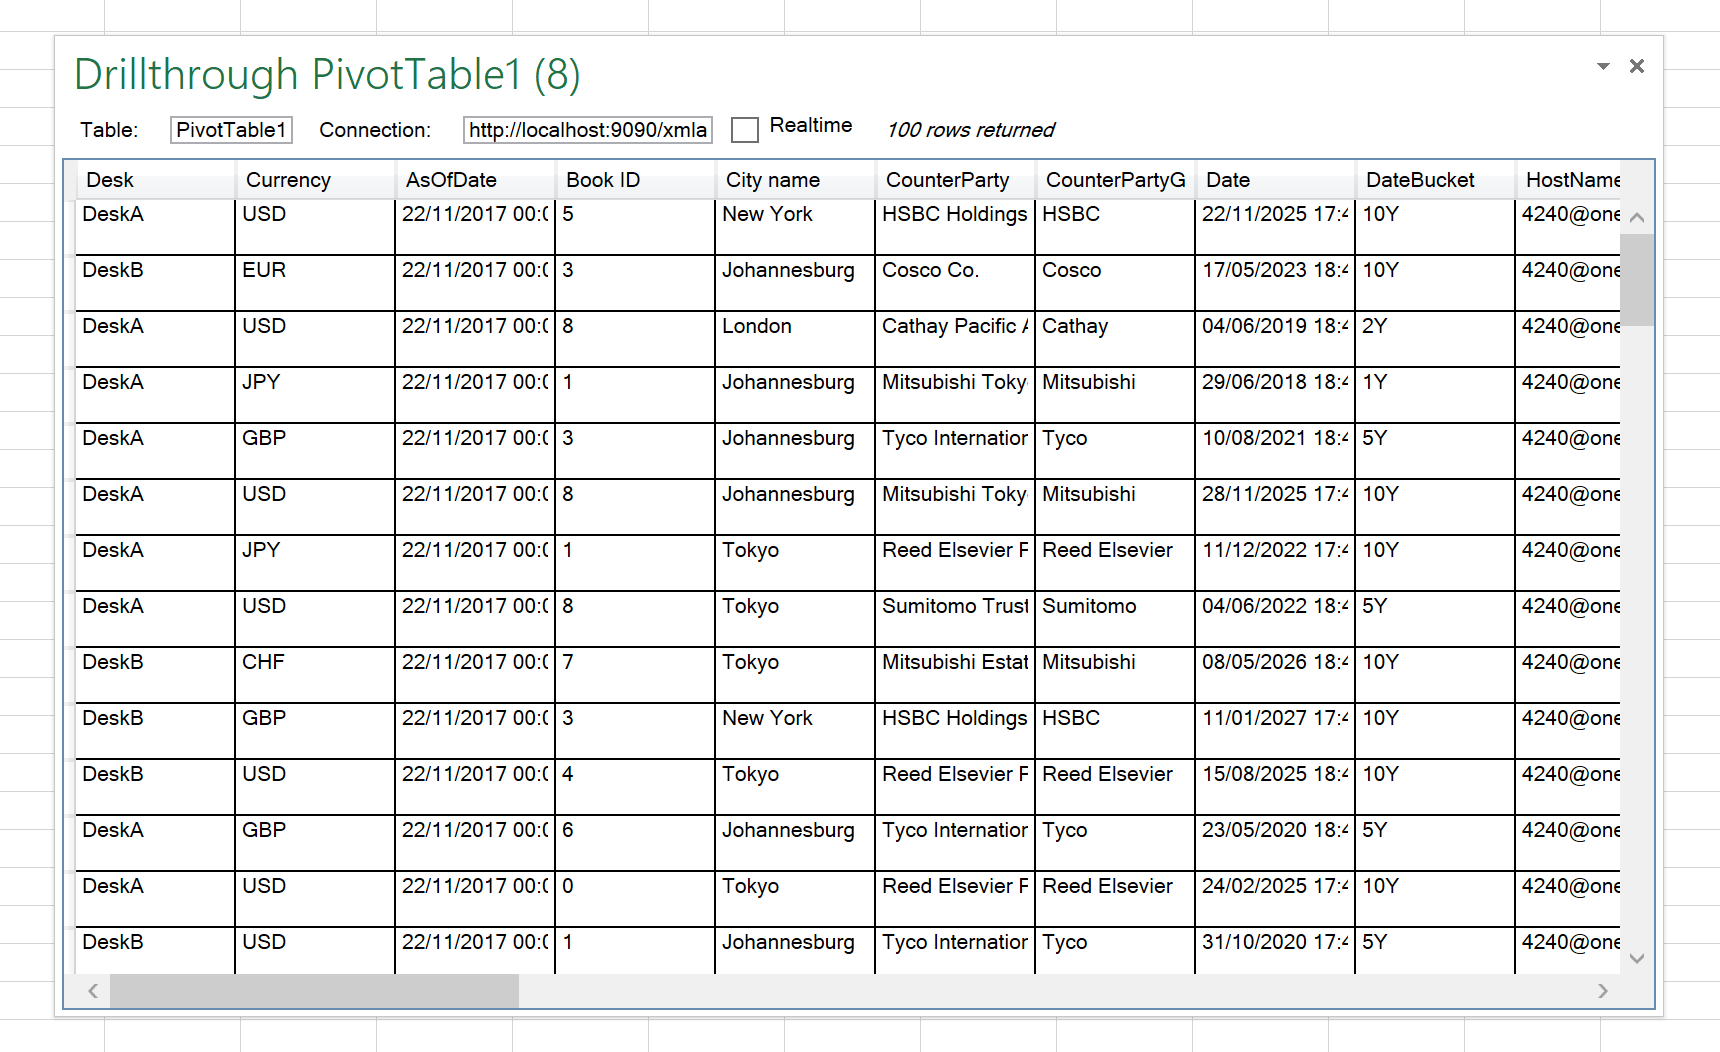
##### Datagrid Drillthrough
The datagrid drillthrough performs a drillthrough up to the first 100 rows of a selection and displayed it a popup
that can be docked within the Excel window:
We do not recommend to switch between the spreadsheets while executing this command due to internal Excel
limitations. Some data may be lost or corrupted.
##### Datagrid Drillthrough
The datagrid drillthrough performs a drillthrough up to the first 100 rows of a selection and displayed it a popup
that can be docked within the Excel window:
 ### RealTime
The realtime button enables the update of the data in real-time. The refresh interval can be modified in
the [configuration settings](#configuration). The minimum and default value is 500ms.
### Context Values
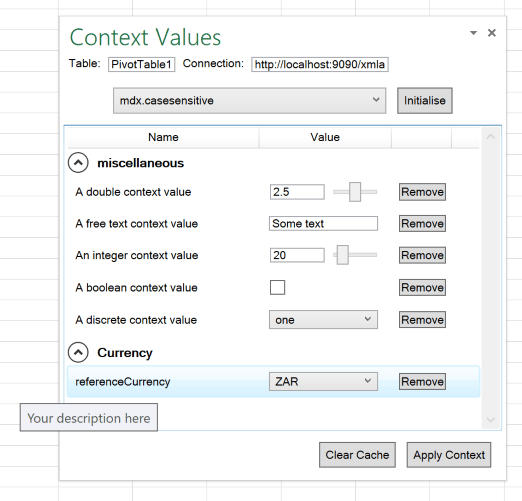
When a pivot table cell is selected, the context values for that specific pivot can be viewed and manipulated in a
popup by selecting the 'Context Values' button in the ribbon.
Uninitialized context values can be set by selecting them from the drop-down menu and pressing the 'Initialize'
button. Context values can be unset by selecting the 'Remove' button. Some context values (e.g. reference currency)
will always have a value set for them, so will reappear in the list with a default value if removed.
To confirm any changes you want to be submitted to the cube select the 'Apply Context' button. The 'Clear Cache'
button clears the internal context values cache held by the add-in and re-requests the values from the cube,so this
will cancel any changes you have made but not applied. Close the window when you are done.
### RealTime
The realtime button enables the update of the data in real-time. The refresh interval can be modified in
the [configuration settings](#configuration). The minimum and default value is 500ms.
### Context Values
When a pivot table cell is selected, the context values for that specific pivot can be viewed and manipulated in a
popup by selecting the 'Context Values' button in the ribbon.
Uninitialized context values can be set by selecting them from the drop-down menu and pressing the 'Initialize'
button. Context values can be unset by selecting the 'Remove' button. Some context values (e.g. reference currency)
will always have a value set for them, so will reappear in the list with a default value if removed.
To confirm any changes you want to be submitted to the cube select the 'Apply Context' button. The 'Clear Cache'
button clears the internal context values cache held by the add-in and re-requests the values from the cube,so this
will cancel any changes you have made but not applied. Close the window when you are done.
 ### MDX Viewer
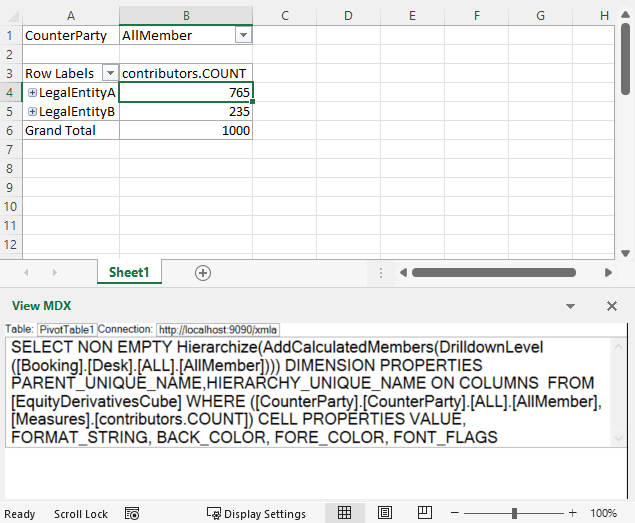
The Mdx viewer button displays the current MDX query made by the pivot table in a drawer at the bottom of the Excel
window.
### MDX Viewer
The Mdx viewer button displays the current MDX query made by the pivot table in a drawer at the bottom of the Excel
window.
 ### Slicer Navigation
The slicer is the filter applied to the pivot table and displayed just above.
### Slicer Navigation
The slicer is the filter applied to the pivot table and displayed just above.
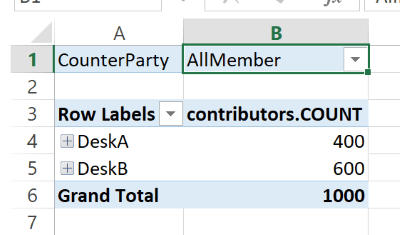 The Next and Previous button in the Slicers section allows you to cycle through the slices for each member on that
level.
The Next and Previous button in the Slicers section allows you to cycle through the slices for each member on that
level.
