> ## Documentation Index
> Fetch the complete documentation index at: https://docs.activeviam.com/llms.txt
> Use this file to discover all available pages before exploring further.
# Approve limits
> How to approve or reject a limit in the Inventory, including when approval is required and the restrictions that apply during the approval process.
Depending on the limits workflow defined in the [limit structure](./create-limit/create-limit-ui#create-a-limit-structure), you may need to approve limits before they can be checked against exposures. You can approve or reject individual limits within a limit structure in the [Inventory](./limits-inventory).
There are a few limitations to approving and rejecting a limit:
* The limit must be in a state other than the final state of the workflow. Usually, these are the `Initialized`, `Edit`, or `Pending Deletion` states.
* The active user must have a role required to approve the limit or if the property `limits.workflow-rules.can-approver-be-same-as-creator` in application.yml is true (default is false). If the latter is true, then the approver can also be the creator. When you create a limit, the creator sets which roles are in charge of moving the limit along the workflow. If you do not have the specified role, you will not be able to move the limit along the workflow unless of course you have the property stated before set as true and, you are the creator of the limit.
When you create a limit, you set which roles can move the limit along the workflow. If you do not have the specified role, you will not be able to move the limit along the workflow.
If the property `limits.workflow-rules.can-approver-be-same-as-creator` in [application.yml](../properties/property-files/application-yml) is enabled (set to `true`), the creator of the limit can also approve it. By default, this option is disabled.
Once you’ve made sure that the above conditions are satisfied, follow these steps:
1. In the **Inventory**, click the name of the required limit structure.
This displays the list of limits within the structure.
2. Select the checkbox in front of the required limit. You can select multiple limits at once.
3. Click **Approve** or **Reject** above the table, depending on whether you want to approve or reject the limits.
This opens the **Confirm Approve**/**Confirm Reject** dialog.
Here’s what the **Confirm Approve** dialog looks like:
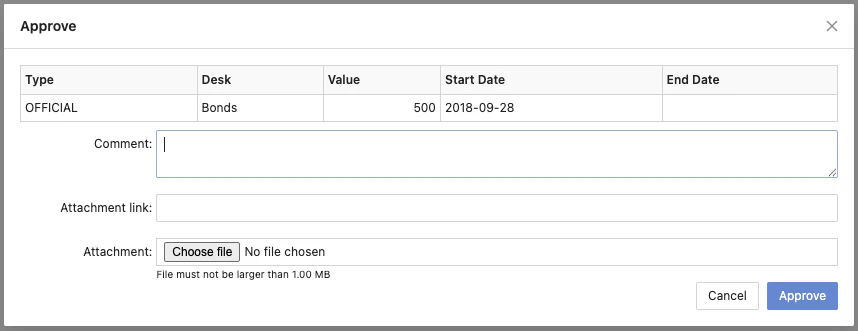 3. If needed, enter a comment, add a link to a document with additional information, or attach a file.
To learn more about attachment links, see our video on [adding attachments](../videos#attachments-and-links-for-review-workflows).
4. Click **Approve**/**Reject**. Your comment and a clickable attachment link will be shown in the **History** panel.
For more information on the **History** panel, see [View the limit history](./view-edit-limit#view-the-limit-history).
3. If needed, enter a comment, add a link to a document with additional information, or attach a file.
To learn more about attachment links, see our video on [adding attachments](../videos#attachments-and-links-for-review-workflows).
4. Click **Approve**/**Reject**. Your comment and a clickable attachment link will be shown in the **History** panel.
For more information on the **History** panel, see [View the limit history](./view-edit-limit#view-the-limit-history).